

This post includes affiliate links. If you make a purchase through these links, I may earn a small commission at no additional cost to you.
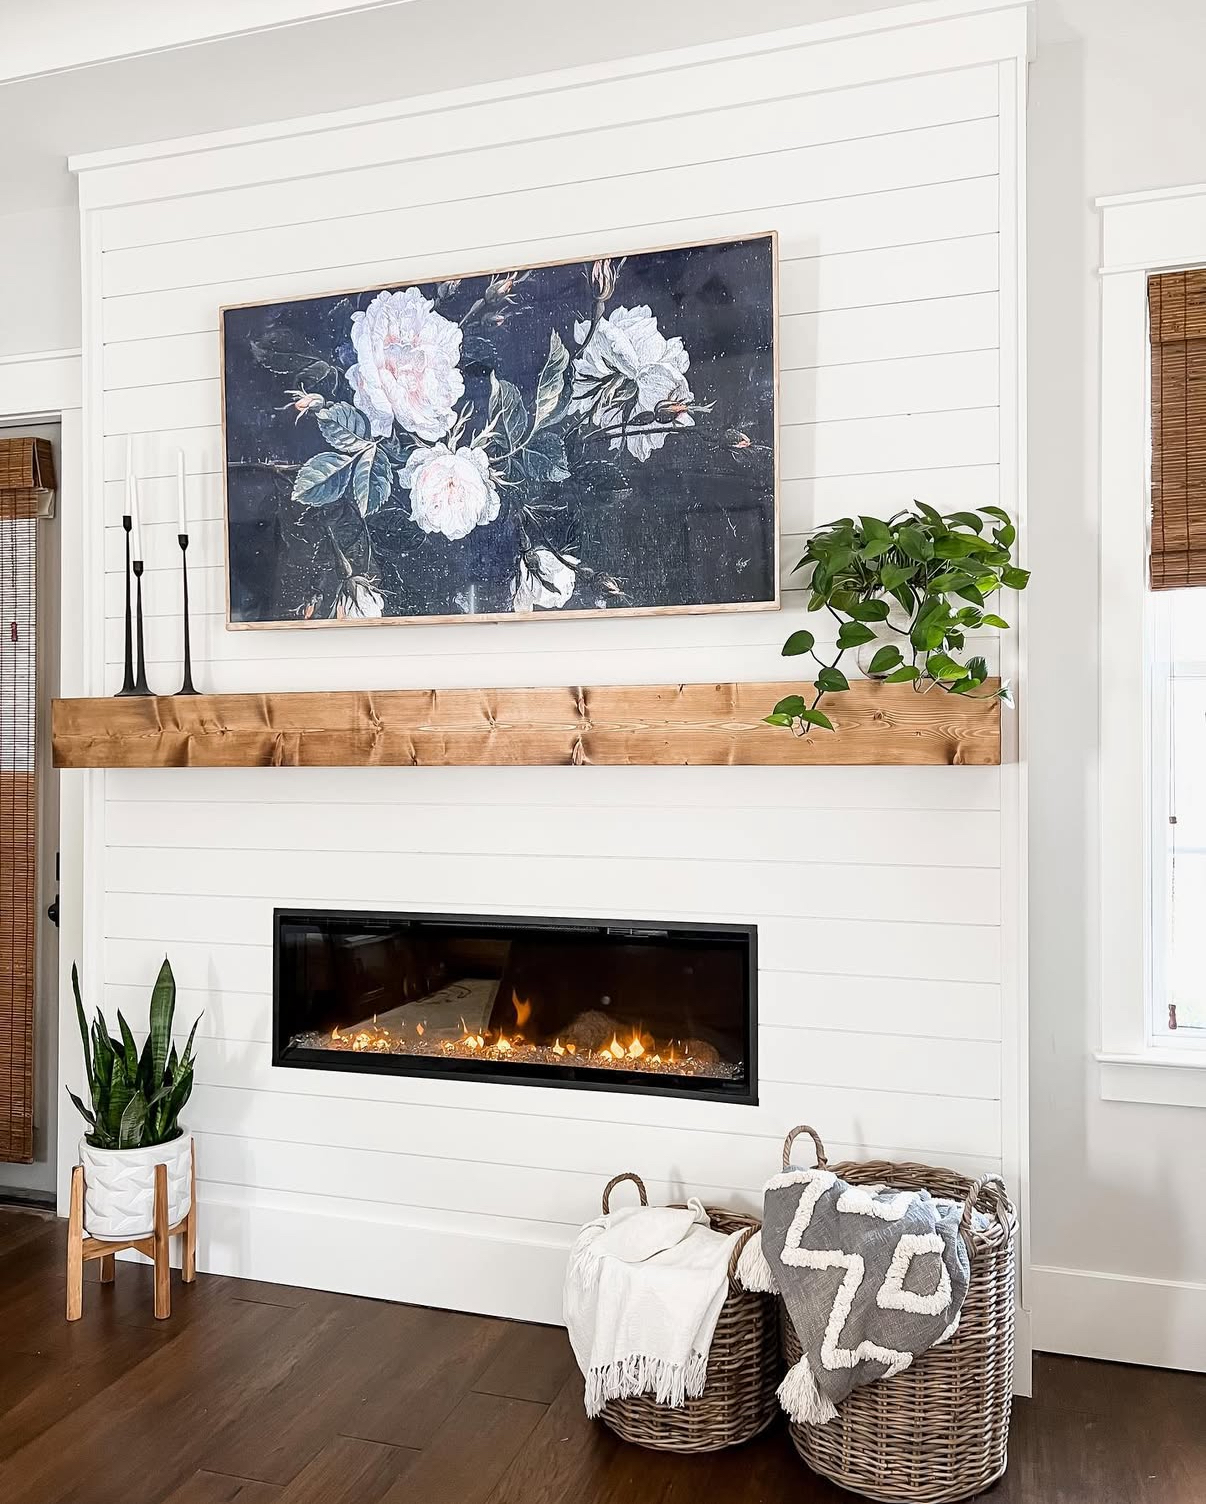
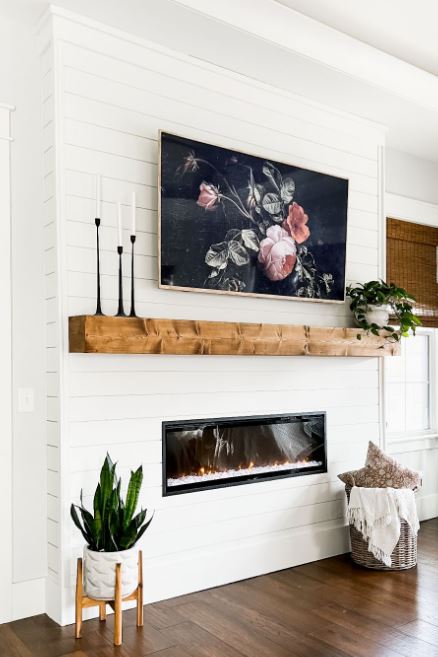
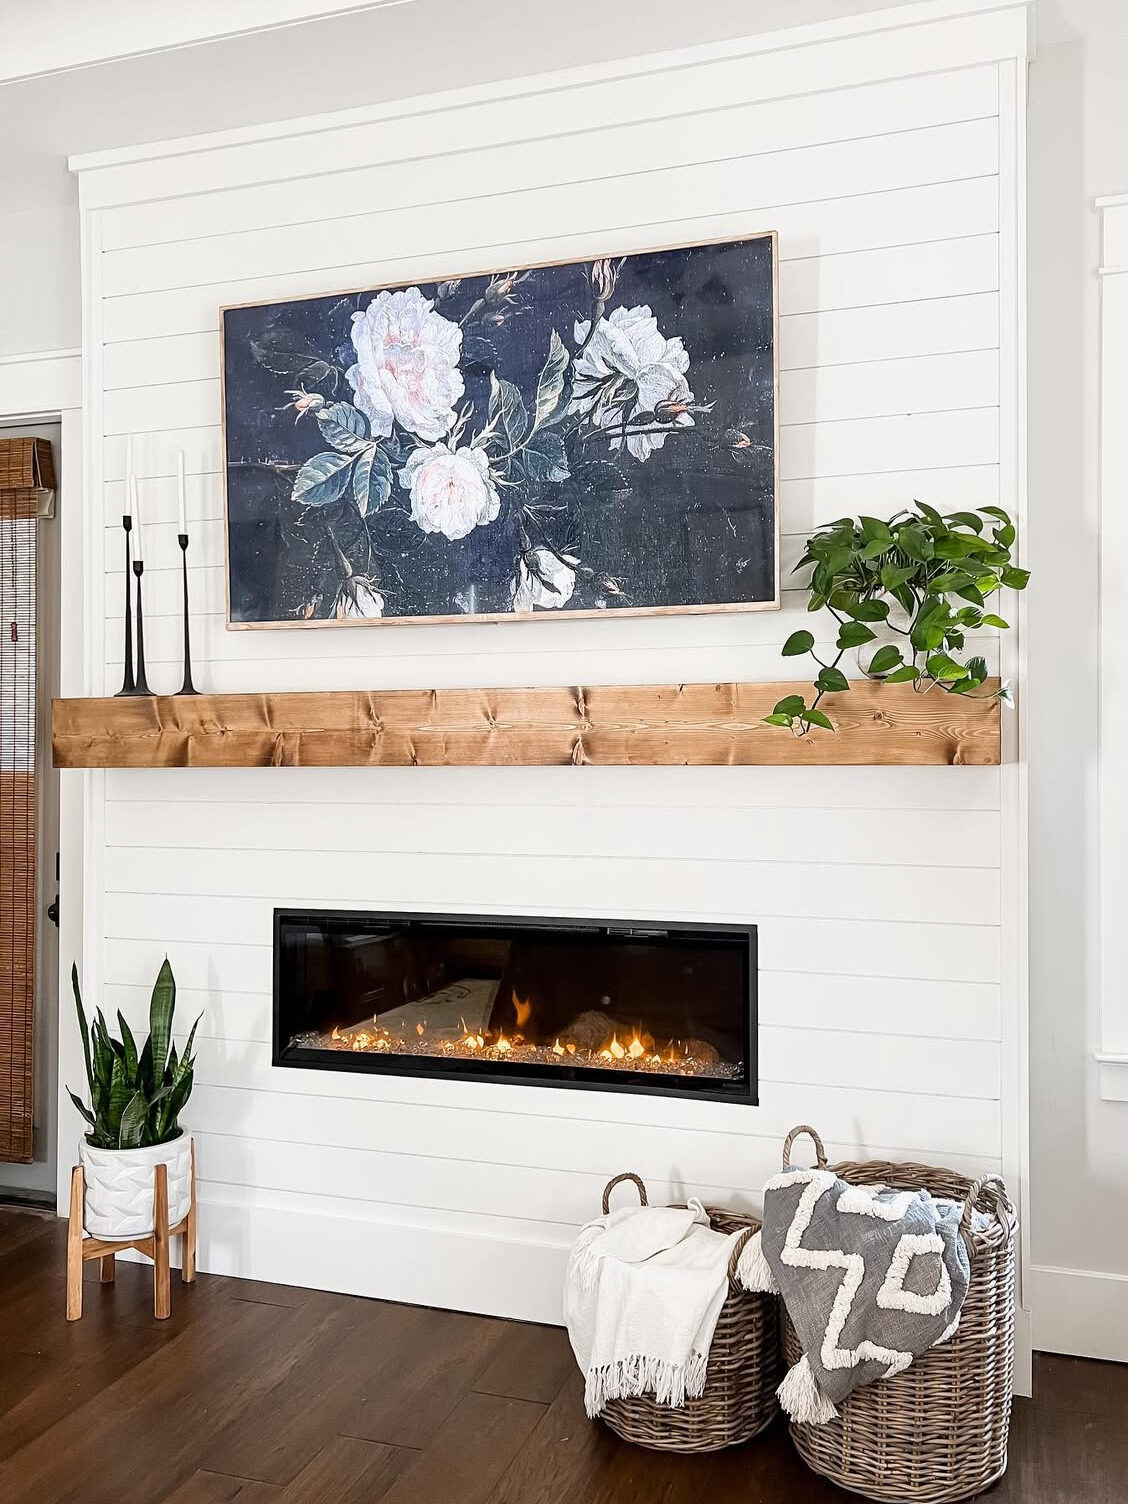
I am so excited about this post because this is truly one of my all-time favorite DIY projects! Today, I’m sharing all of the details of our DIY shiplap electric fireplace and mantel, plus a step-by-step tutorial so you can build one yourself. This is a completely in-depth guide of how I transformed our boring bedroom TV wall into a warm, cozy, Pinterest-worthy statement piece.
And trust me, I’m not a professional by any means, so if I can do it, you absolutely can too!
Why We Wanted a Fireplace
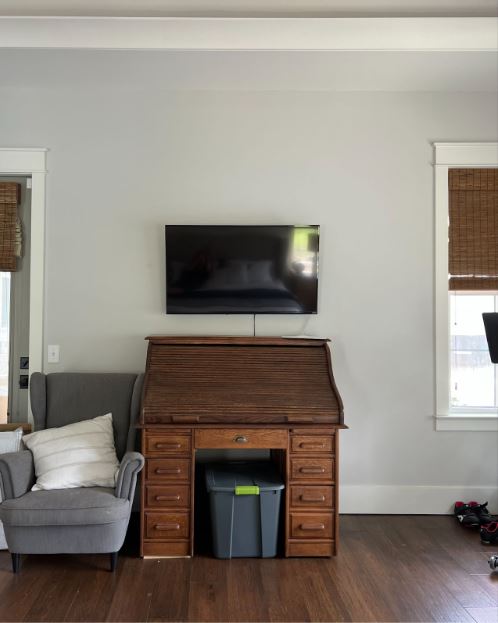
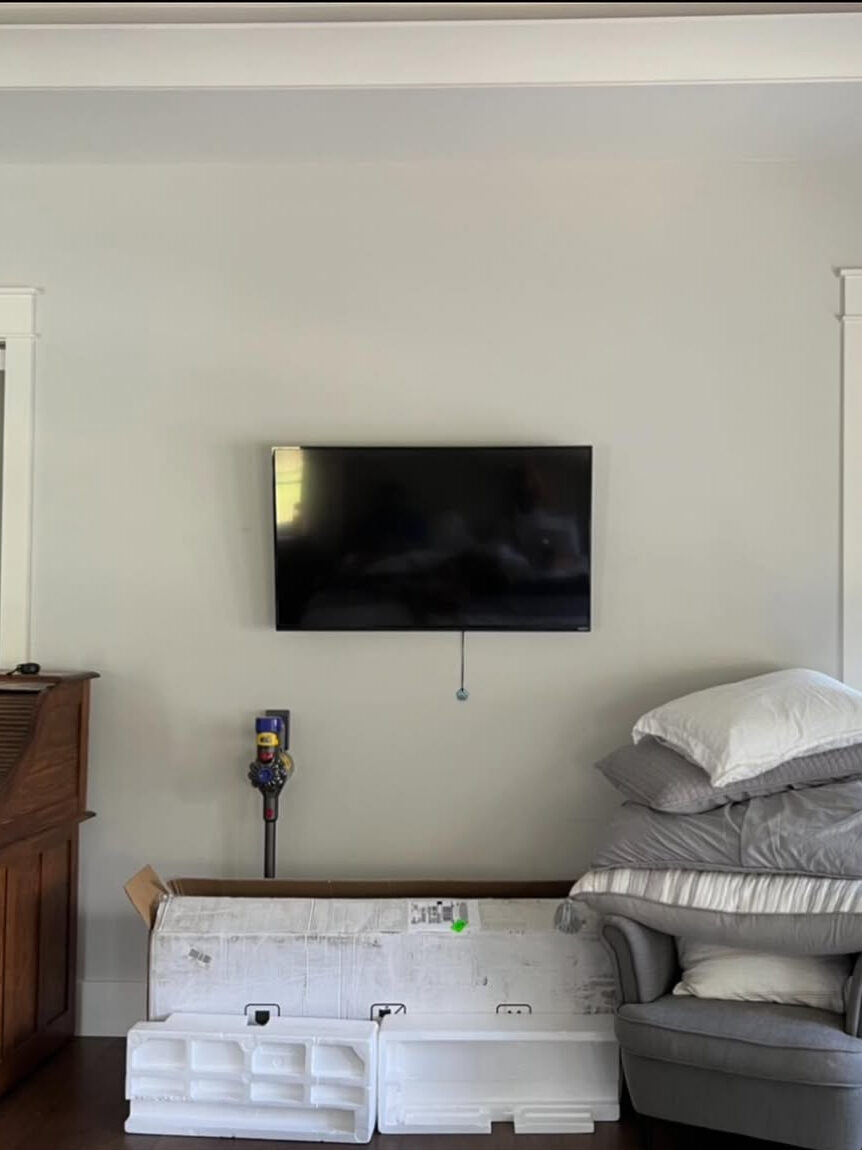
When we designed our floor plan, we always planned to include a fireplace in our master suite. But as the build went on and our budget got tighter, that plan had to be scrapped.
Once we moved in, we mounted the TV on the wall and hoped that one day we’d finally add the fireplace we dreamed of. Every day, I stared at this wall and hated how plain it looked. It added nothing to the aesthetic or coziness of our room.
So, when the opportunity finally came to partner with @Dimplex_NorthAmerica and install one of their beautiful electric fireplaces, I was more than ready. And now? This space is hands-down my favorite part of our entire bedroom. It adds the warm, cozy ambiance I always imagined, and I still can’t believe I built it myself!
My hope is that this guide encourages you to create the fireplace feature wall of your dreams. Be sure to check out my Instagram Story Highlight if you’d like more in-depth video footage. Let’s get started!
Materials We Used
- Electric Fireplace: Dimplex IgniteXL Built-In Linear Electric Fireplace in 50”
(They offer 4 sizes if you need a different length!) - 1×4 boards (for wall anchors)
- 2×4 boards (for framing)
- 1×8 boards (for mantel box)
- Wood veneer sheets (for mantel end caps)
- Shiplap: 8’ tongue-and-groove boards from @officialmetrie
- Wood filler & caulk
- Paint (color matched to our trim)
- Stain: Minwax Provincial
- Screws, nails, stud finder, level
- Tools: miter saw, nail gun, drill, Kreg jig, sander, measuring tape, etc.
STEP 1: Plan + Measure Everything
Before touching any tools, I sketched the entire build out to scale on graph paper. This step helps so much when you’re trying to visualize the design, and it keeps all of your measurements organized when you start framing.
A few things to determine upfront:
- The total width of your fireplace wall
- How high you want the insert to sit
- How tall your mantel will be
- Where your TV mount will attach
- Placement of hidden electronics (router, antenna, etc.)
Planning also helped me decide to keep the fireplace only about 8 inches off the wall, which is one of the huge benefits of using an electric insert, it makes a big statement without taking up much space at all.

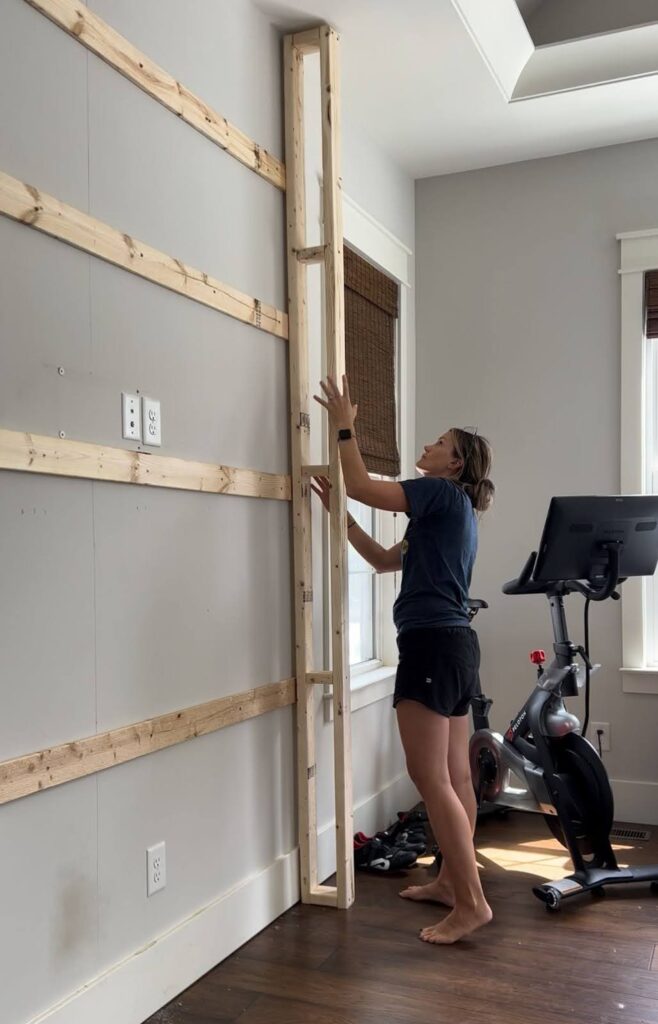
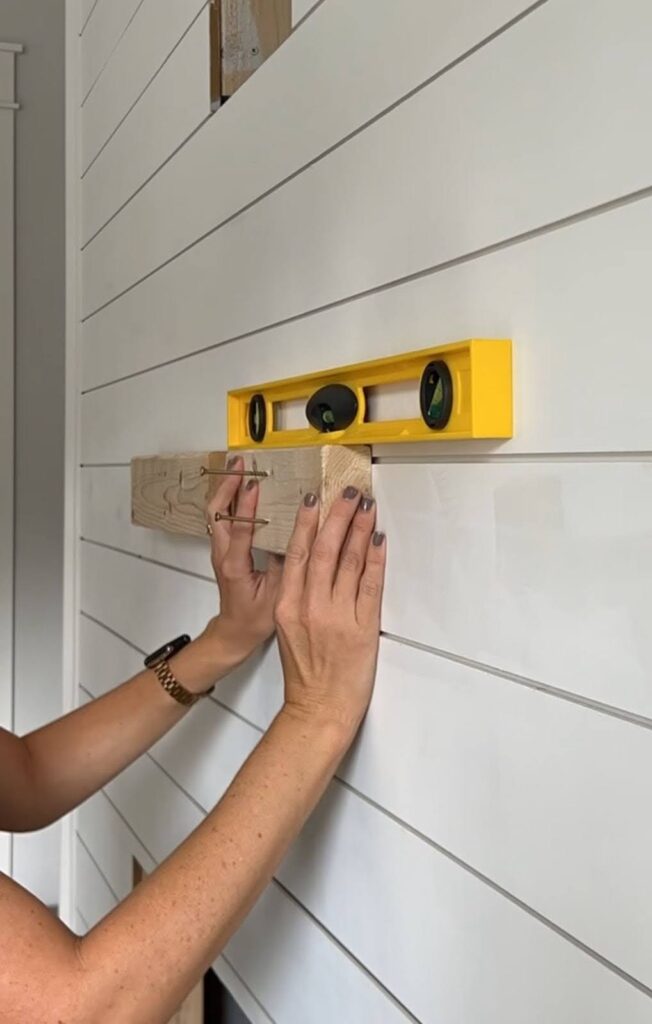
STEP 2: Find Your Studs & Install Anchor Boards
The first thing I did was find the center of the wall and mark all the studs. These studs are what hold everything together, so don’t skip this step.
I installed four horizontal 1×4 boards directly into the studs. These act as strong anchor points for the entire fireplace structure. (Note: I meant for them to be evenly spaced, but sometimes, math is hard.😀I didn’t bother moving them because they would still serve the purpose this way.)
Why this matters:
Attaching everything to studs is what keeps your fireplace sturdy and safe.
STEP 3: Frame the Side Walls & Front
Next, I built the two side walls, which are essentially shallow 2×4 frames that come out about eight inches from the wall. Electric fireplaces don’t require venting, so you don’t need any additional depth beyond what your insert requires. Once the side frames were built, I secured them to the anchored 1×4 boards.
Tip: Some tutorials say to remove your baseboards, but that depends on your trim style. Ours are 1×8, so they stick out the same distance as my anchor boards installed in the previous step. This allowed me to keep them in place without affecting the look of the build.
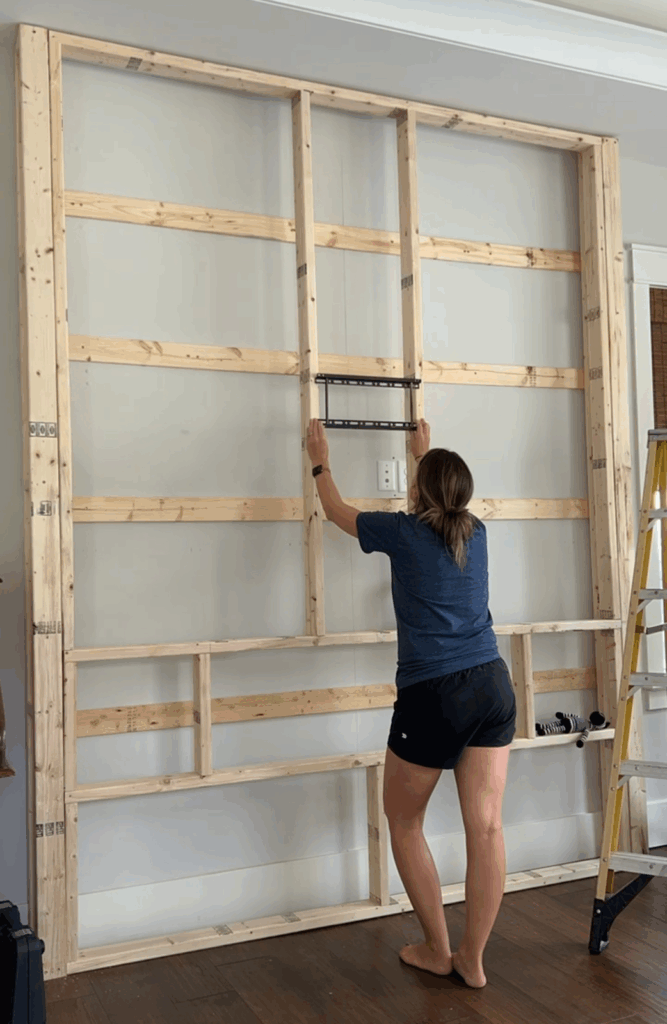
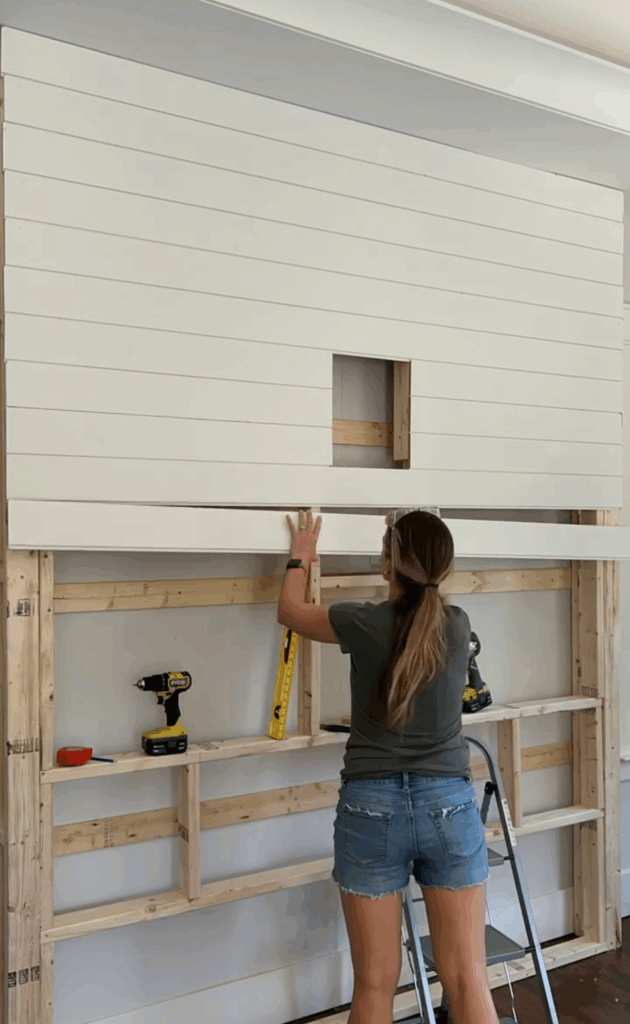
After installing the side walls, it was time to frame the front. I started from the bottom and worked my way up, first framing the shelf and hole for the fireplace to sit on.
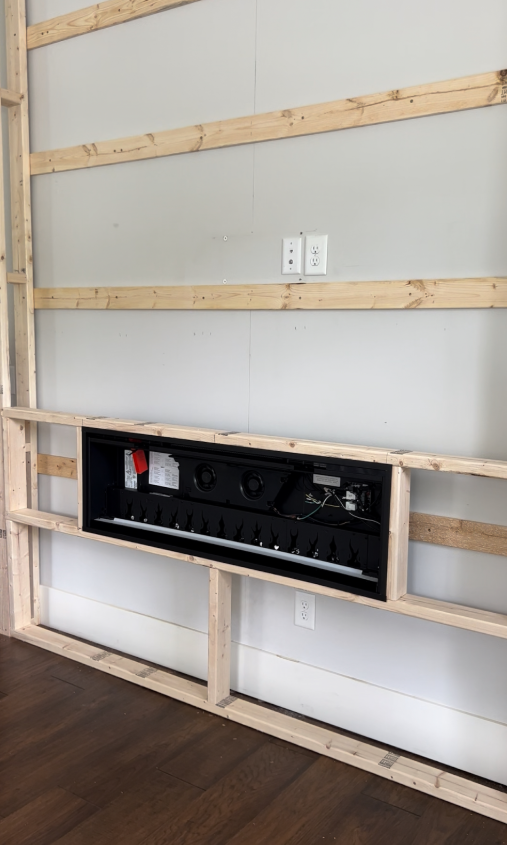
Tip: If you’re planning to mount a TV, make sure the center supports in the upper section are spaced at 16 inches or less, which is the standard distance for most TV mounts. I recommend measuring the mount holes first to confirm!
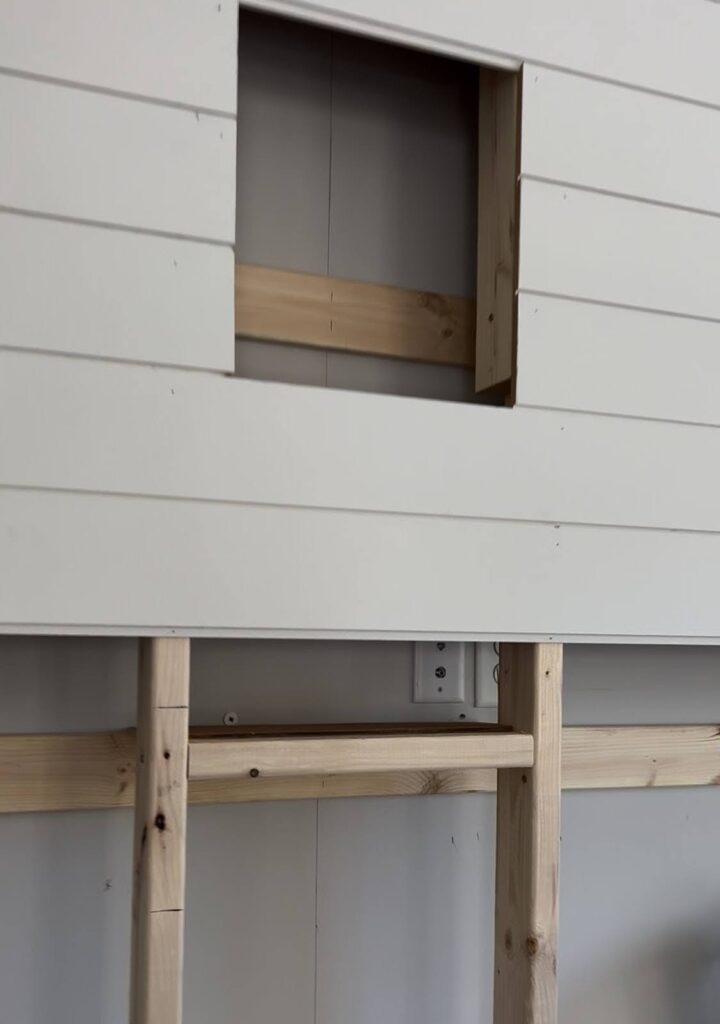
Another Tip: Before covering with shiplap, I used scrap wood to create a small interior shelf behind the shiplap for hiding our router and antenna. We then left a hole for easy access to existing outlets for TV installation.
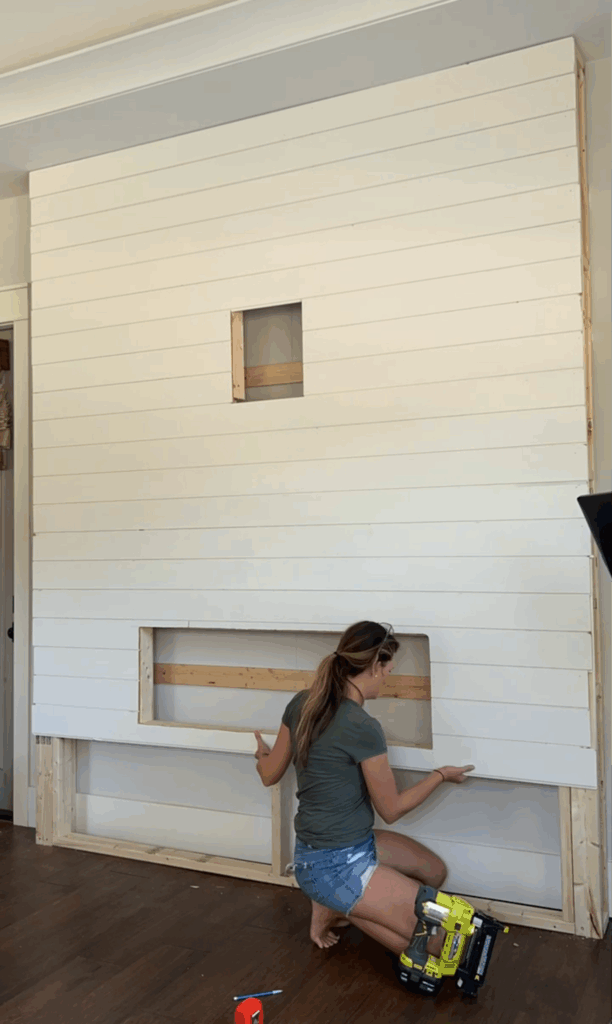
STEP 4: Add Shiplap (My Favorite Step!)
We used 8’ tongue-and-groove shiplap boards from @officialmetrie, and they were incredibly easy to work with.
Here’s how we installed them:
- Start at the top and work your way down
- Measure each board individually (walls are rarely perfectly straight)
- Nail boards into the framing
- Keep the gaps consistent by using the built-in tongue-and-groove system
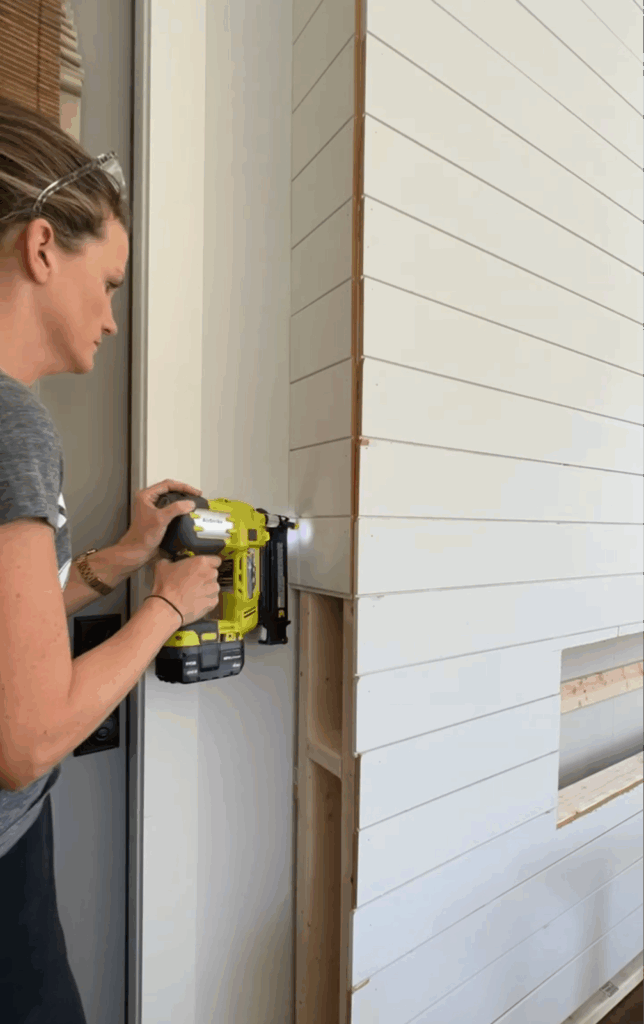
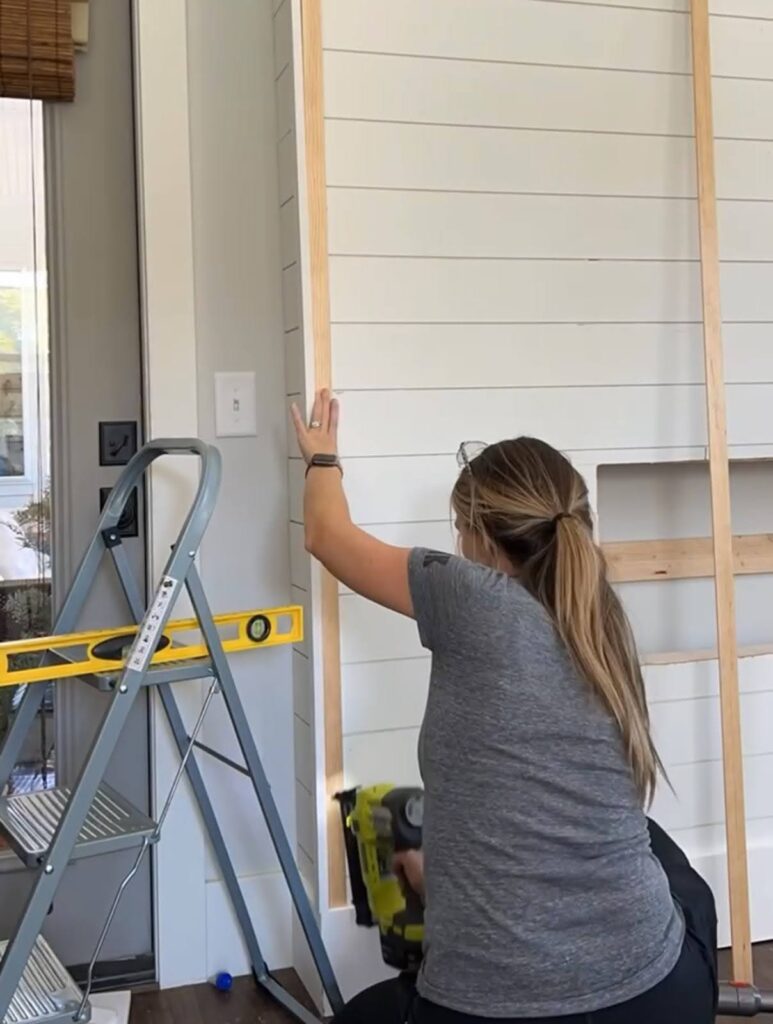
STEP 5: Trim Out the Corners
Once the shiplap was up, I added trim to all corners and edges so everything looked clean and polished. This instantly elevates the entire project and makes it look custom-built. I recommend matching your existing trim! It makes any DIY look like it was part of the original home.
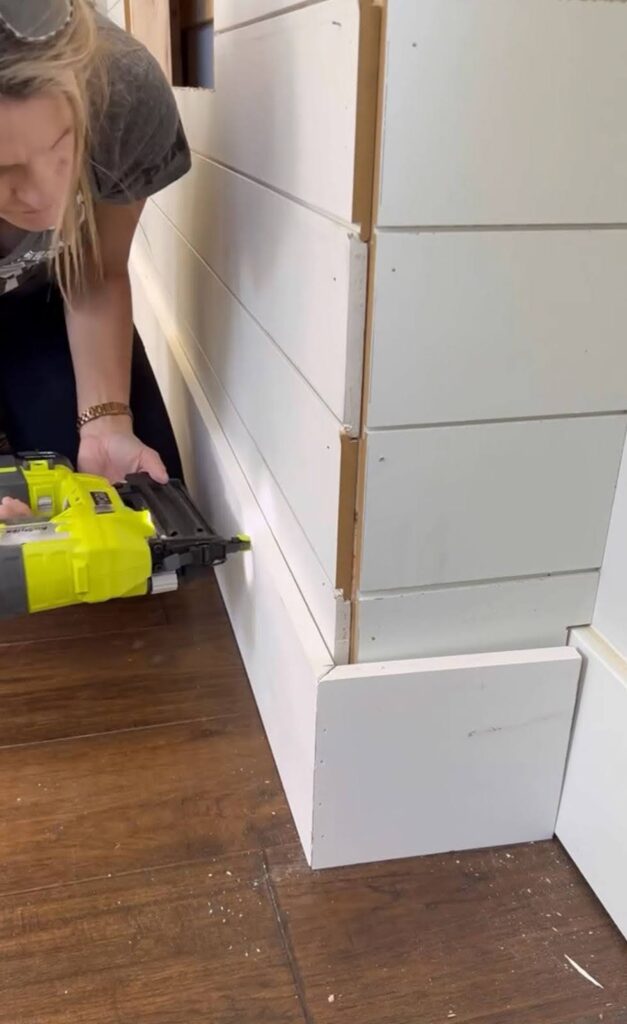
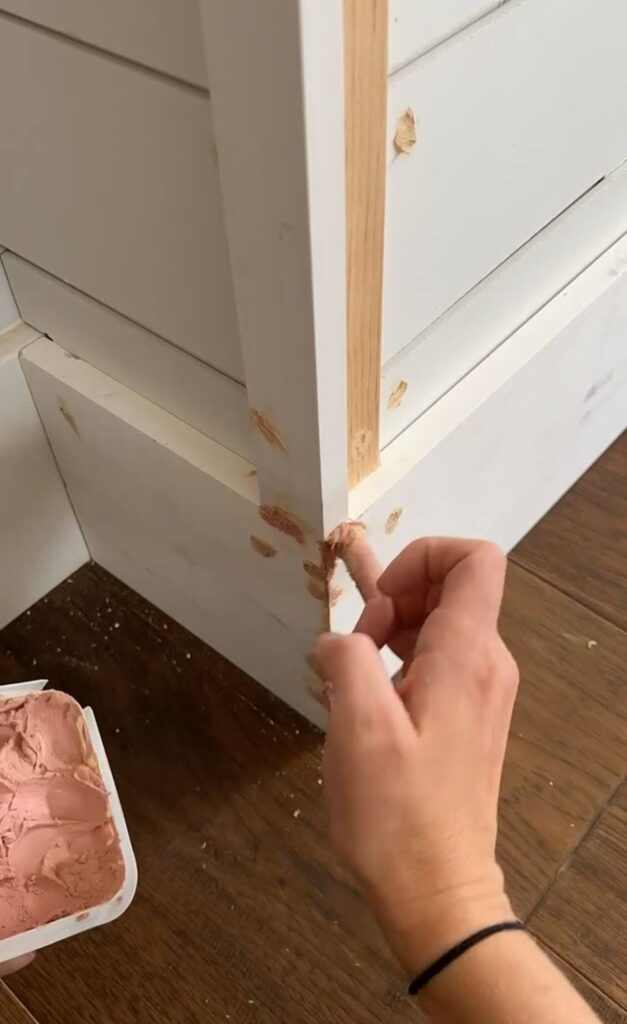
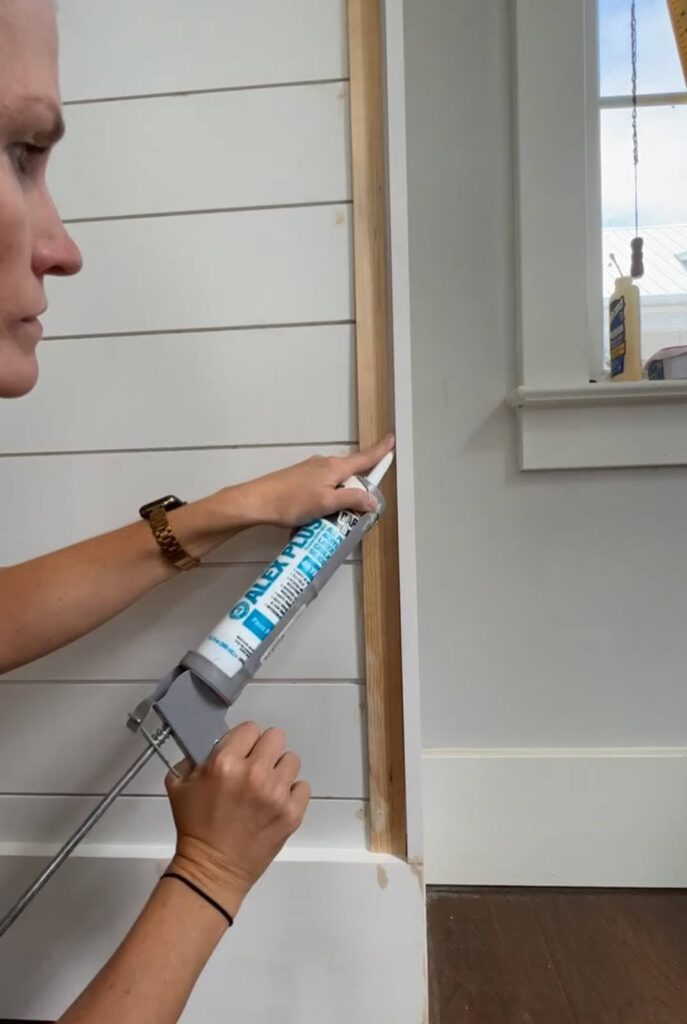
STEP 6: Fill, Sand + Caulk
Not the most fun part, but totally worth it. I filled every nail hole, sanded everything smooth, and caulked all the seams. These little details give you that seamless, professional finish.
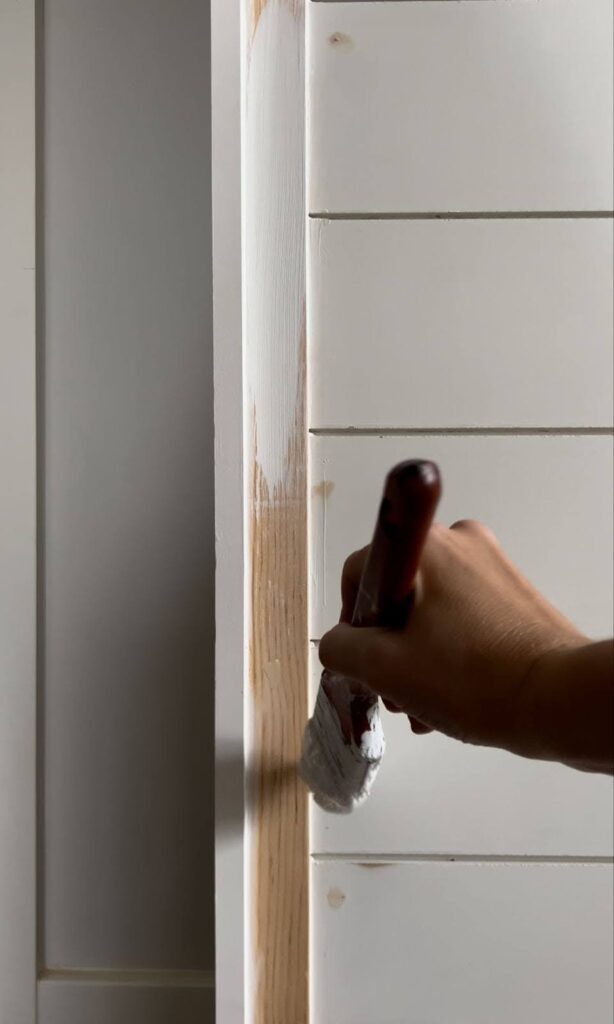
STEP 7: Paint Your Fireplace Surround
With everything sanded and smooth, it was time for paint! We color-matched the rest of our room’s trim so the fireplace looked truly built-in. All of the white in our home is Alabaster by Sherwin Williams.
I painted the grooves first with a brush, then rolled the boards for a clean, smooth finish.
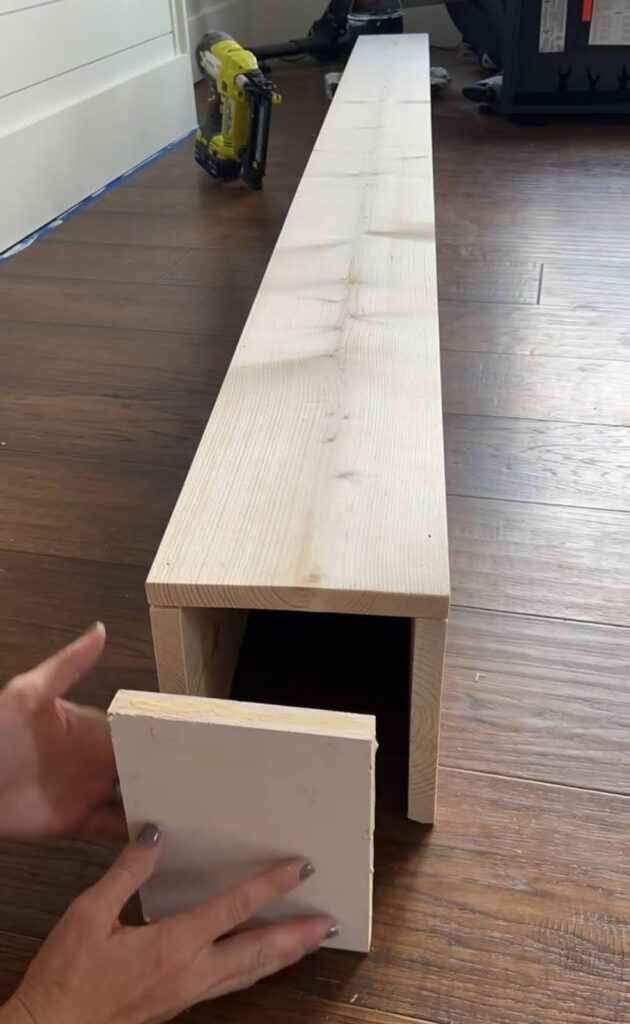
STEP 8: Build the Chunky Wood Mantel
The mantel completely transformed the look of the fireplace.
Here’s how I built it:
- Created a three-sided “box” using 1×8 boards
- Covered the ends with thin, sustainable wood sheets that can be stained
- Used wood filler to cover all seams
- Stained everything in Minwax Provincial
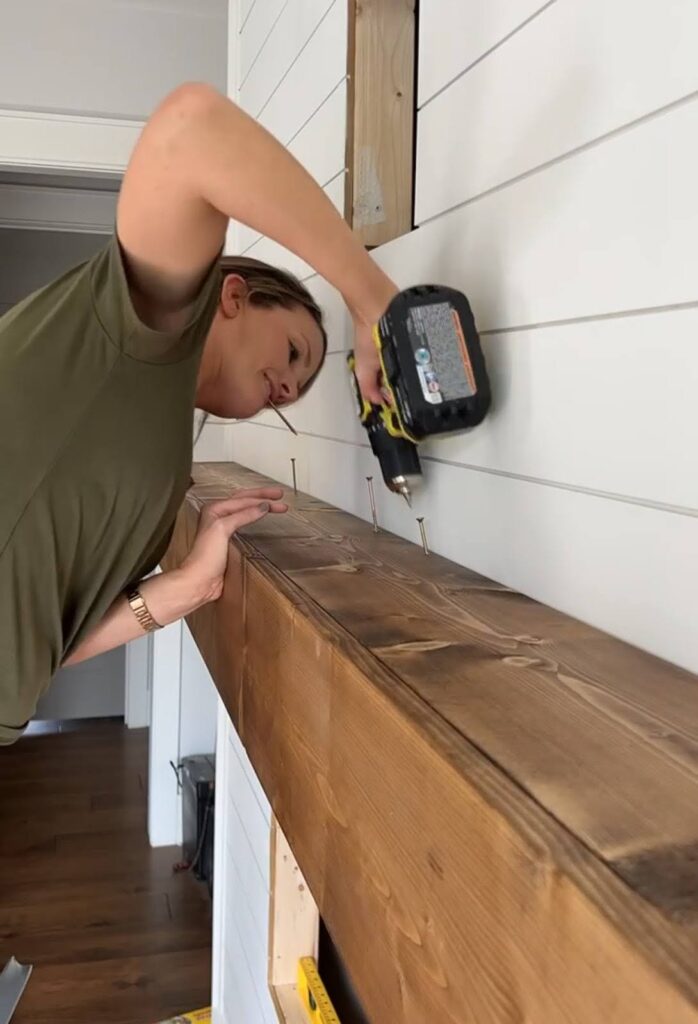
Once dry, I attached a leftover 2×4 to the studs and slid the mantel over it like a sleeve, then screwed it into place. It turned out better than I imagined!
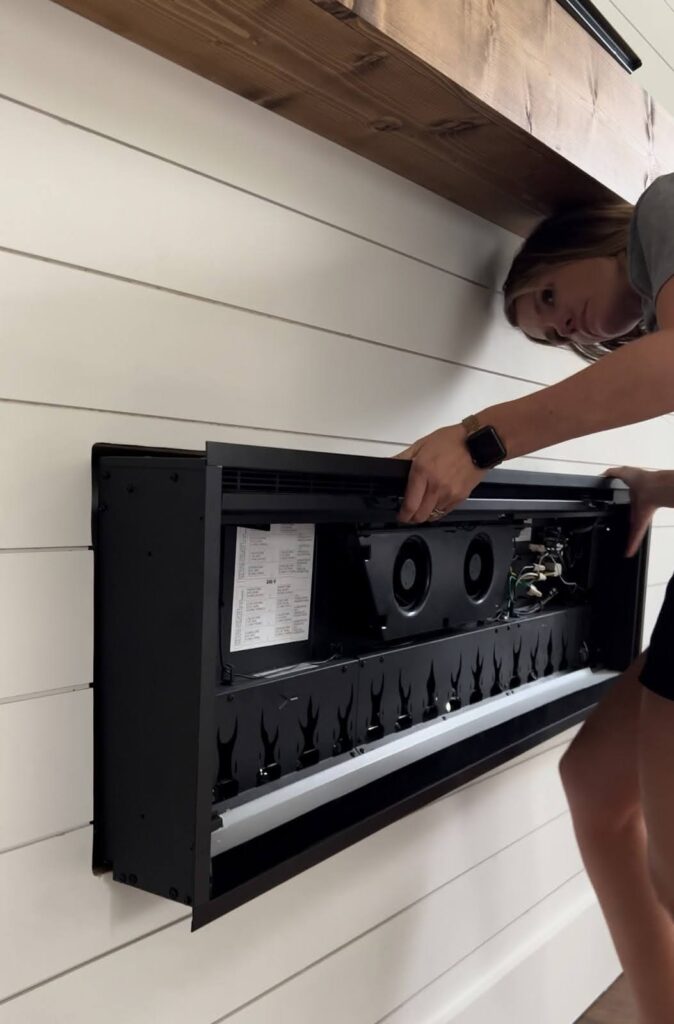
STEP 9: Install the Fireplace Insert
This part was the easiest! We used the Dimplex IgniteXL 50-inch electric fireplace, but they have multiple size options.
Just plug it in, slide it into place, and admire how good it looks!
This insert has:
- Heat & no-heat options
- Multiple color settings
- A sleek, modern look
- Remote or on-unit controls
It’s stunning in person!
The final step was hanging the TV. Once it was in place, the entire feature wall came together, cozy, warm, and absolutely beautiful.
The Final Result
This project completely transformed our bedroom. What used to be a plain, boring TV wall is now a stunning statement piece that brings so much ambiance and warmth to the space.
Every time I walk into our room, I can’t believe I built this with my own two hands. If you’ve been thinking about adding a fireplace feature wall to your home…consider this your sign!
If you recreate this project, I’d love to see it. And if you have any questions about the process, drop them below!
Before + After


Comments +