

This post includes affiliate links. If you make a purchase through these links, I may earn a small commission at no additional cost to you.
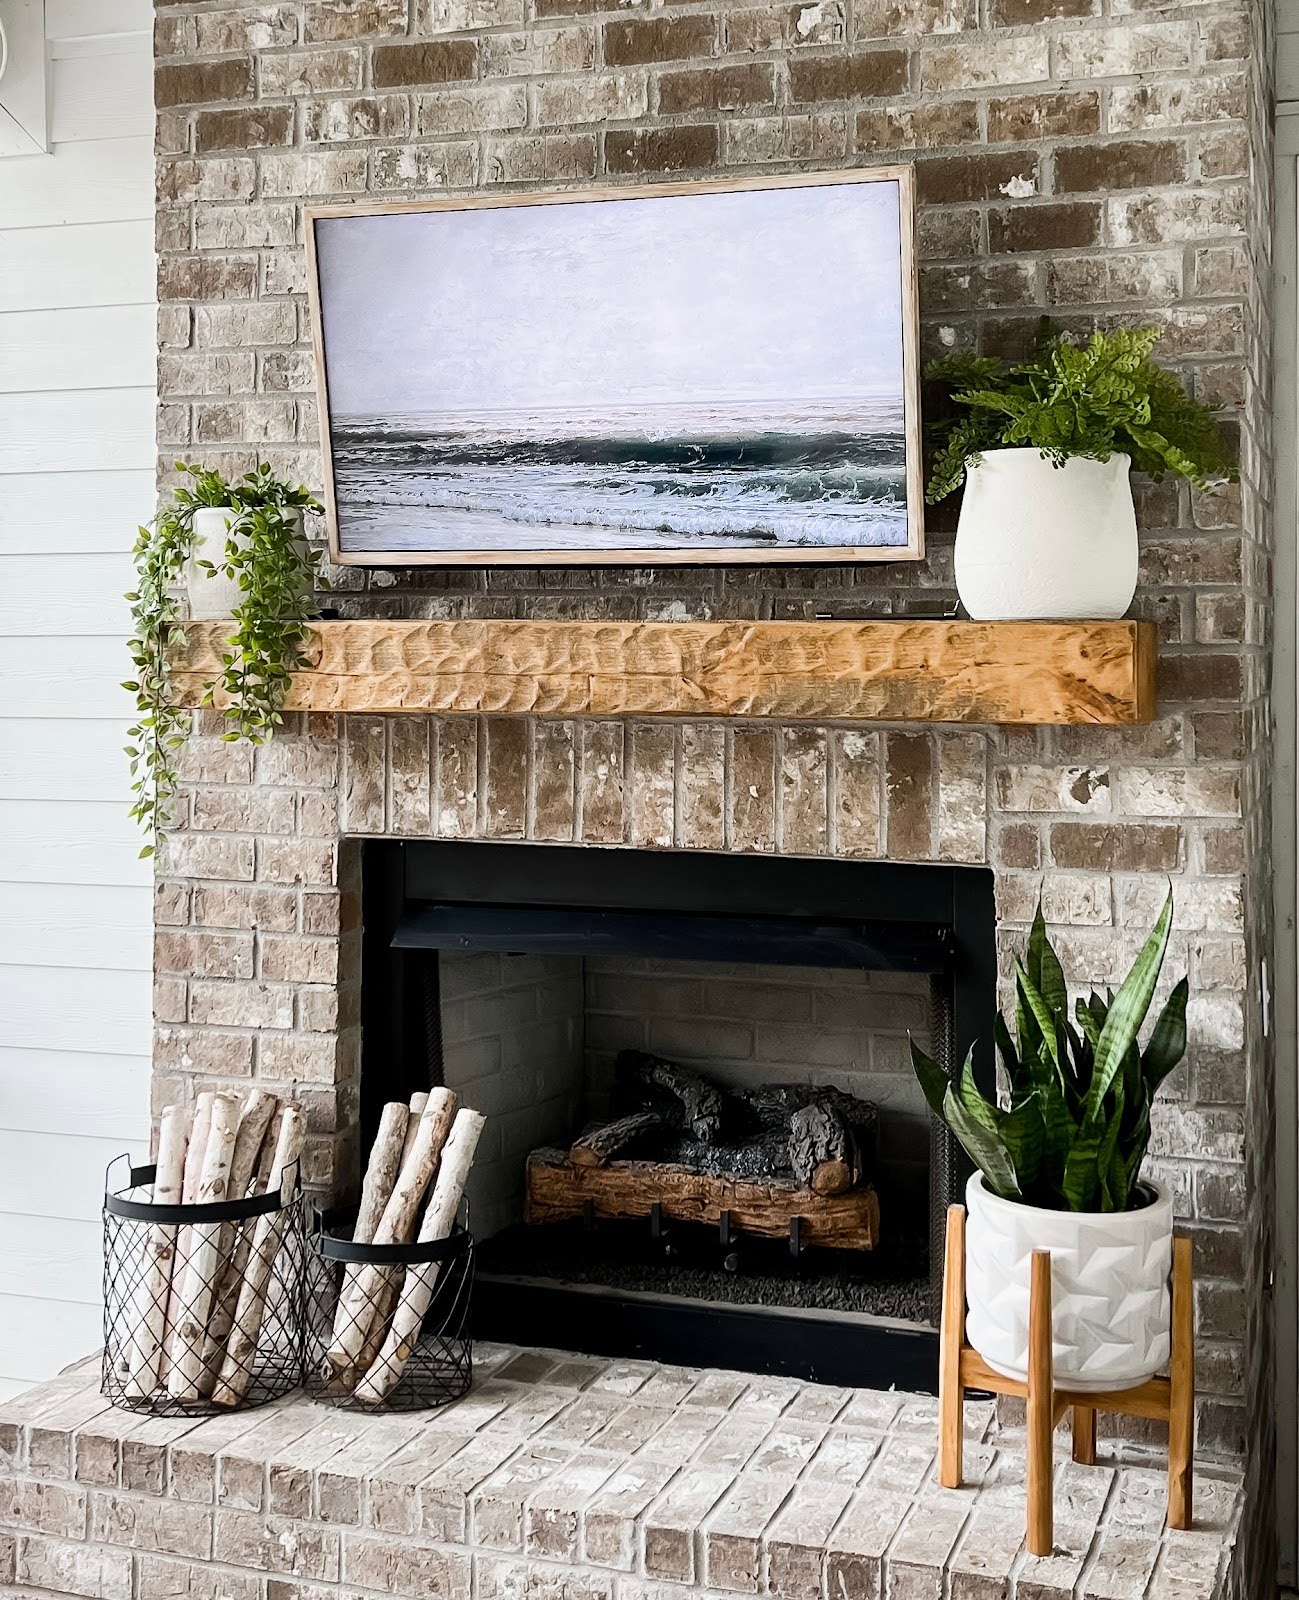
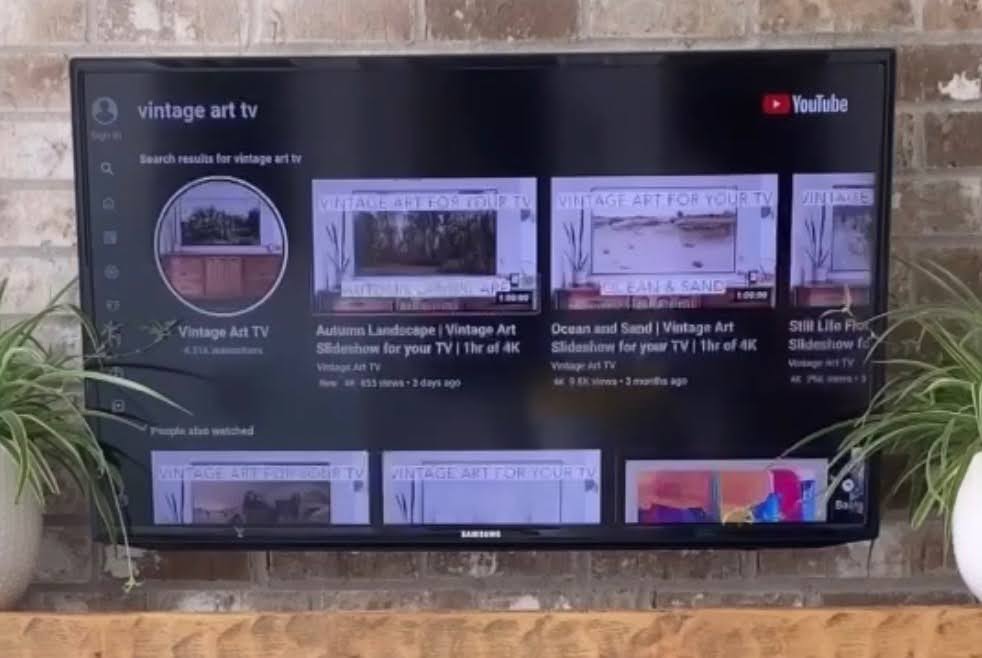
If you’ve ever searched YouTube for vintage art videos to display on your TV, you already know the struggle. The art looks beautiful… until you notice the bold black box of the TV around it. And while a Frame TV would solve the problem, the price tag is less than ideal.
So let’s take that viral hack one step further.
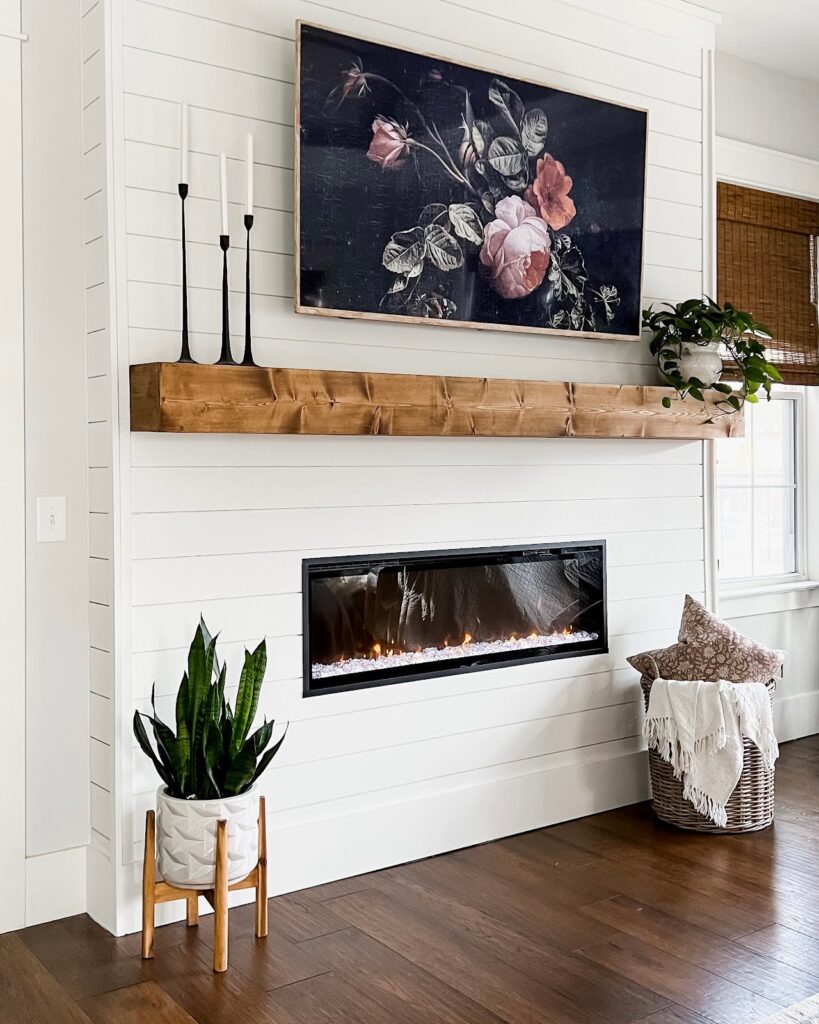
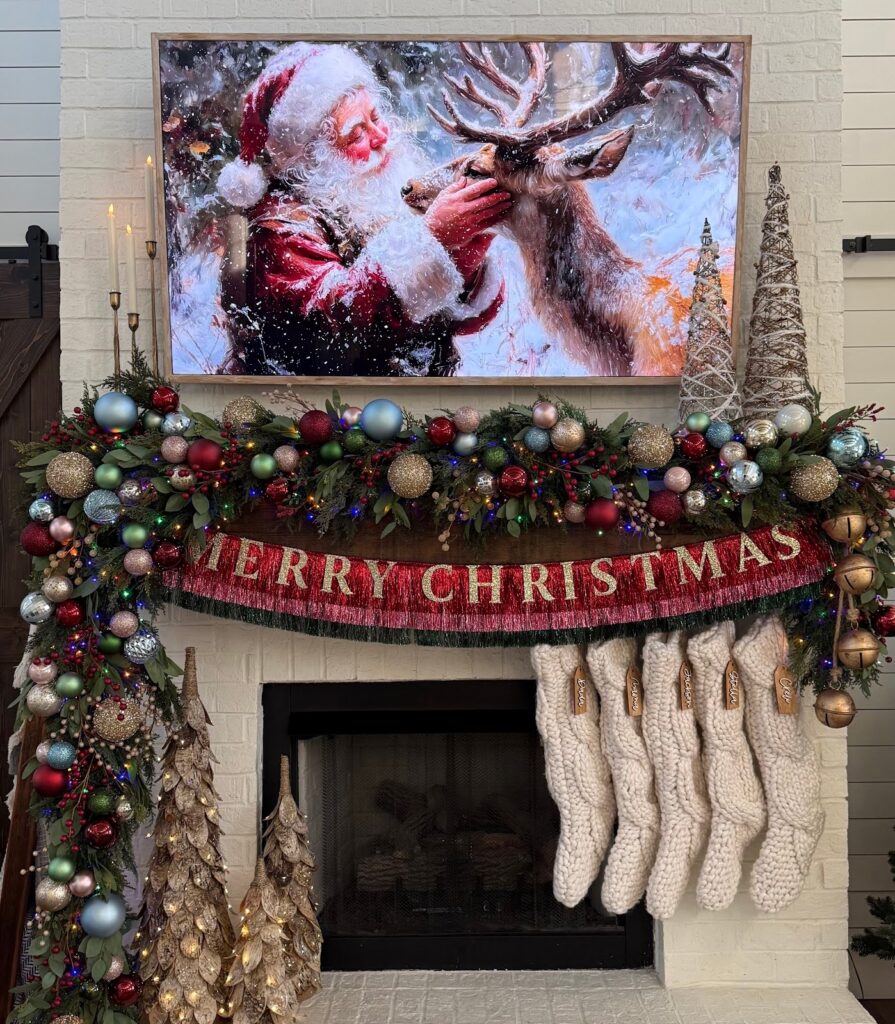
Instead of buying a Frame TV, this simple DIY shows you how to paint your existing TV border to create a warm, vintage-inspired frame look. It’s budget-friendly, beginner-friendly, and totally transforms the vibe of your space. Yes, I said “paint your TV” and yes, my husband looked at me like I was crazy when I mentioned the idea to him! So, I decided to test this idea on an older TV first (highly recommended!) and the results were shockingly good. In fact, so good that I ended up doing it to another two TVs in our house!
Materials Needed
You don’t need much for this project, which makes it even better.
- White chalk paint (literally any brand works! I used this one because it’s what I already had.)
- Brown crème wax
- Paintbrush (any basic brush is fine)
- Painter’s tape
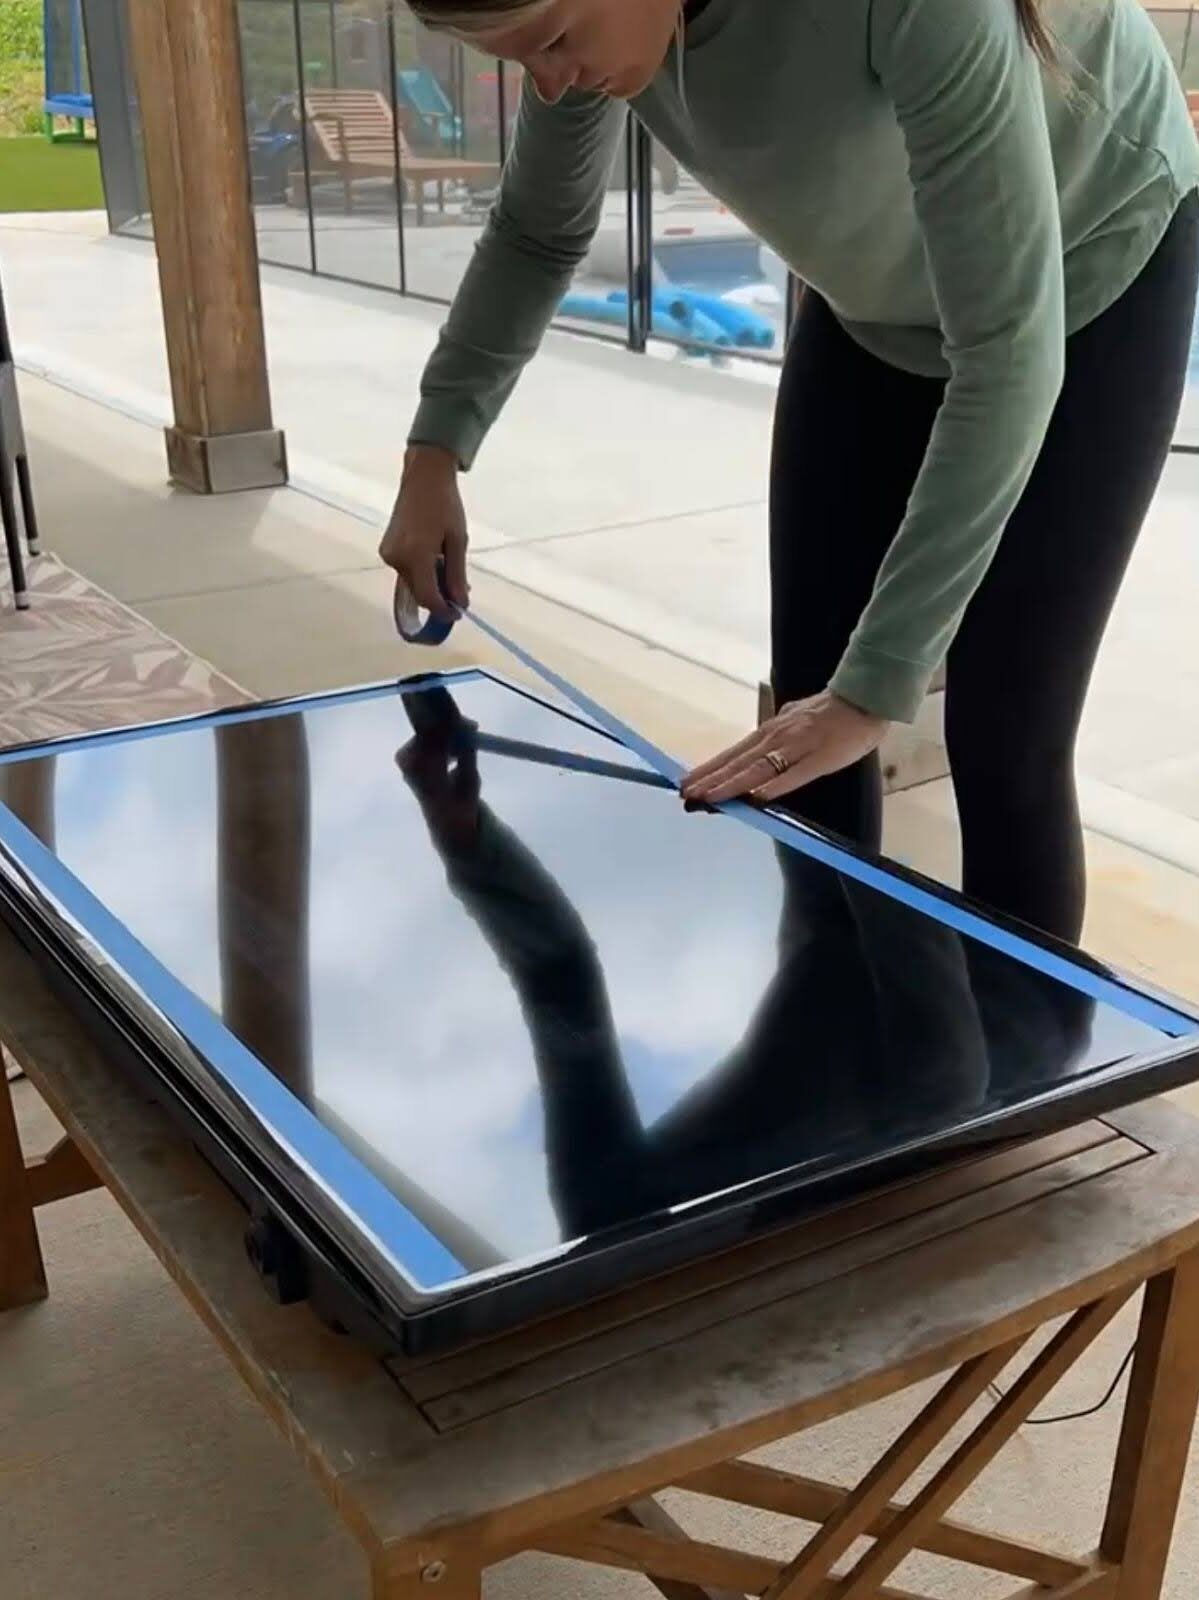
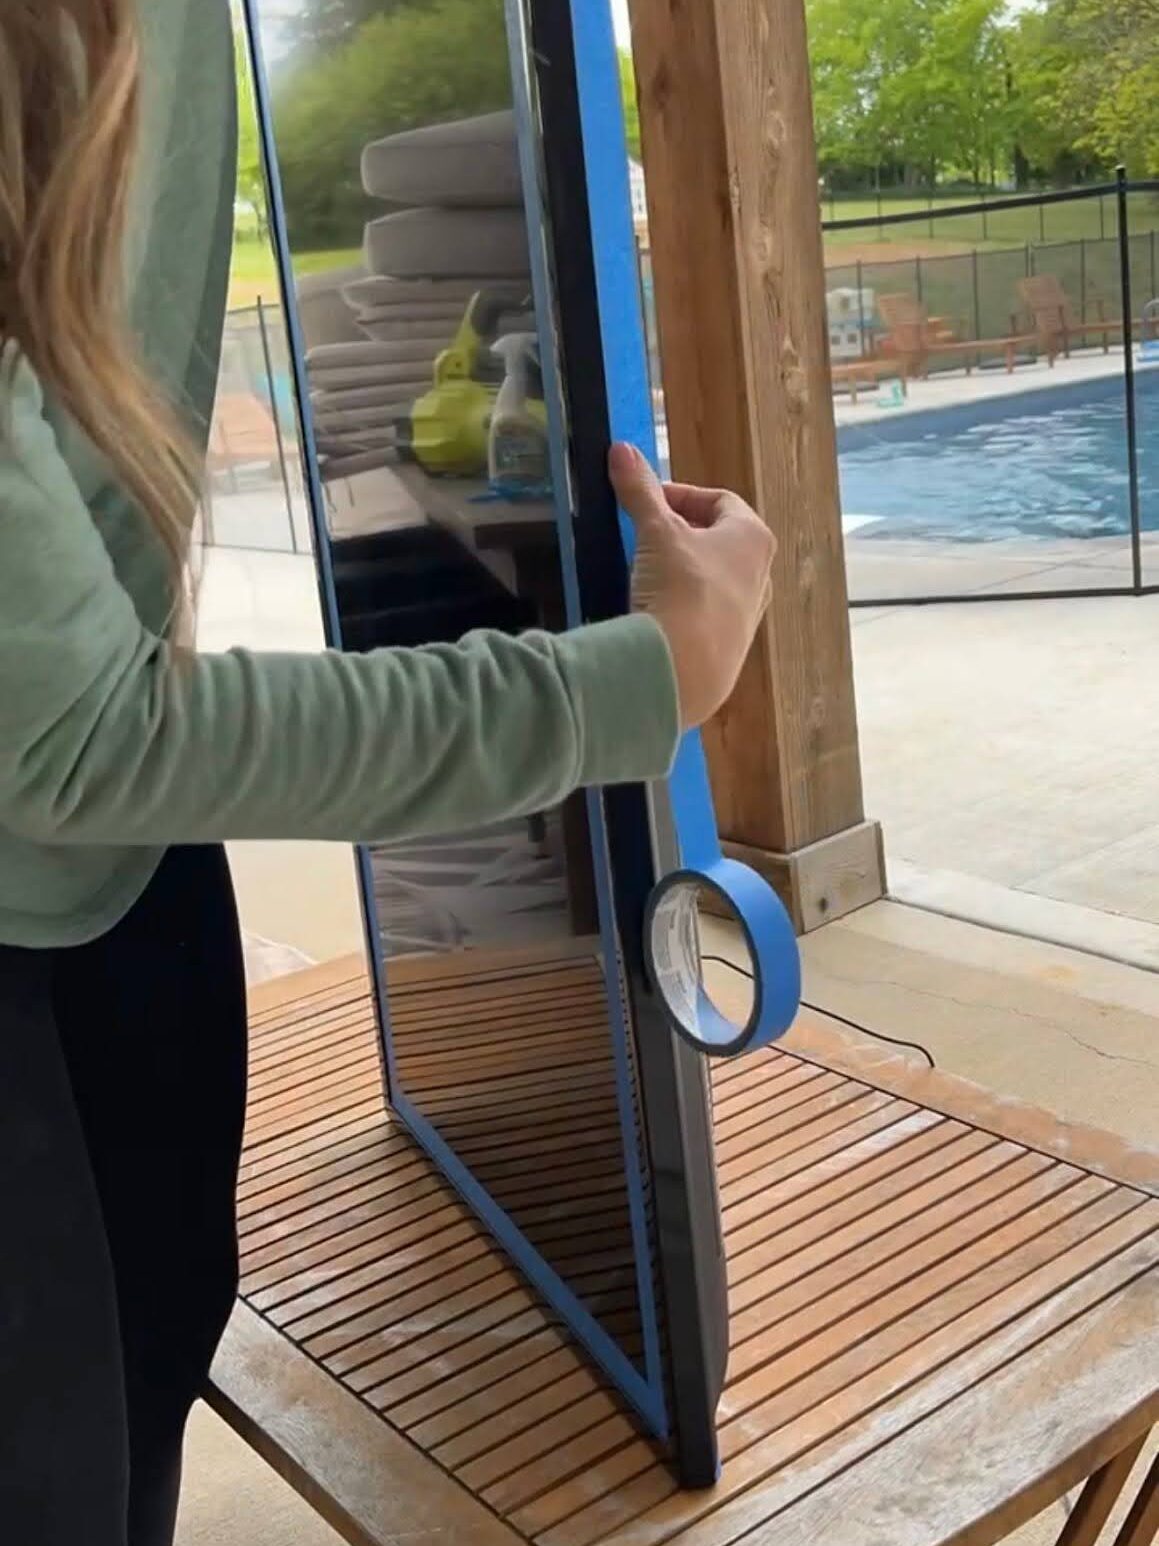
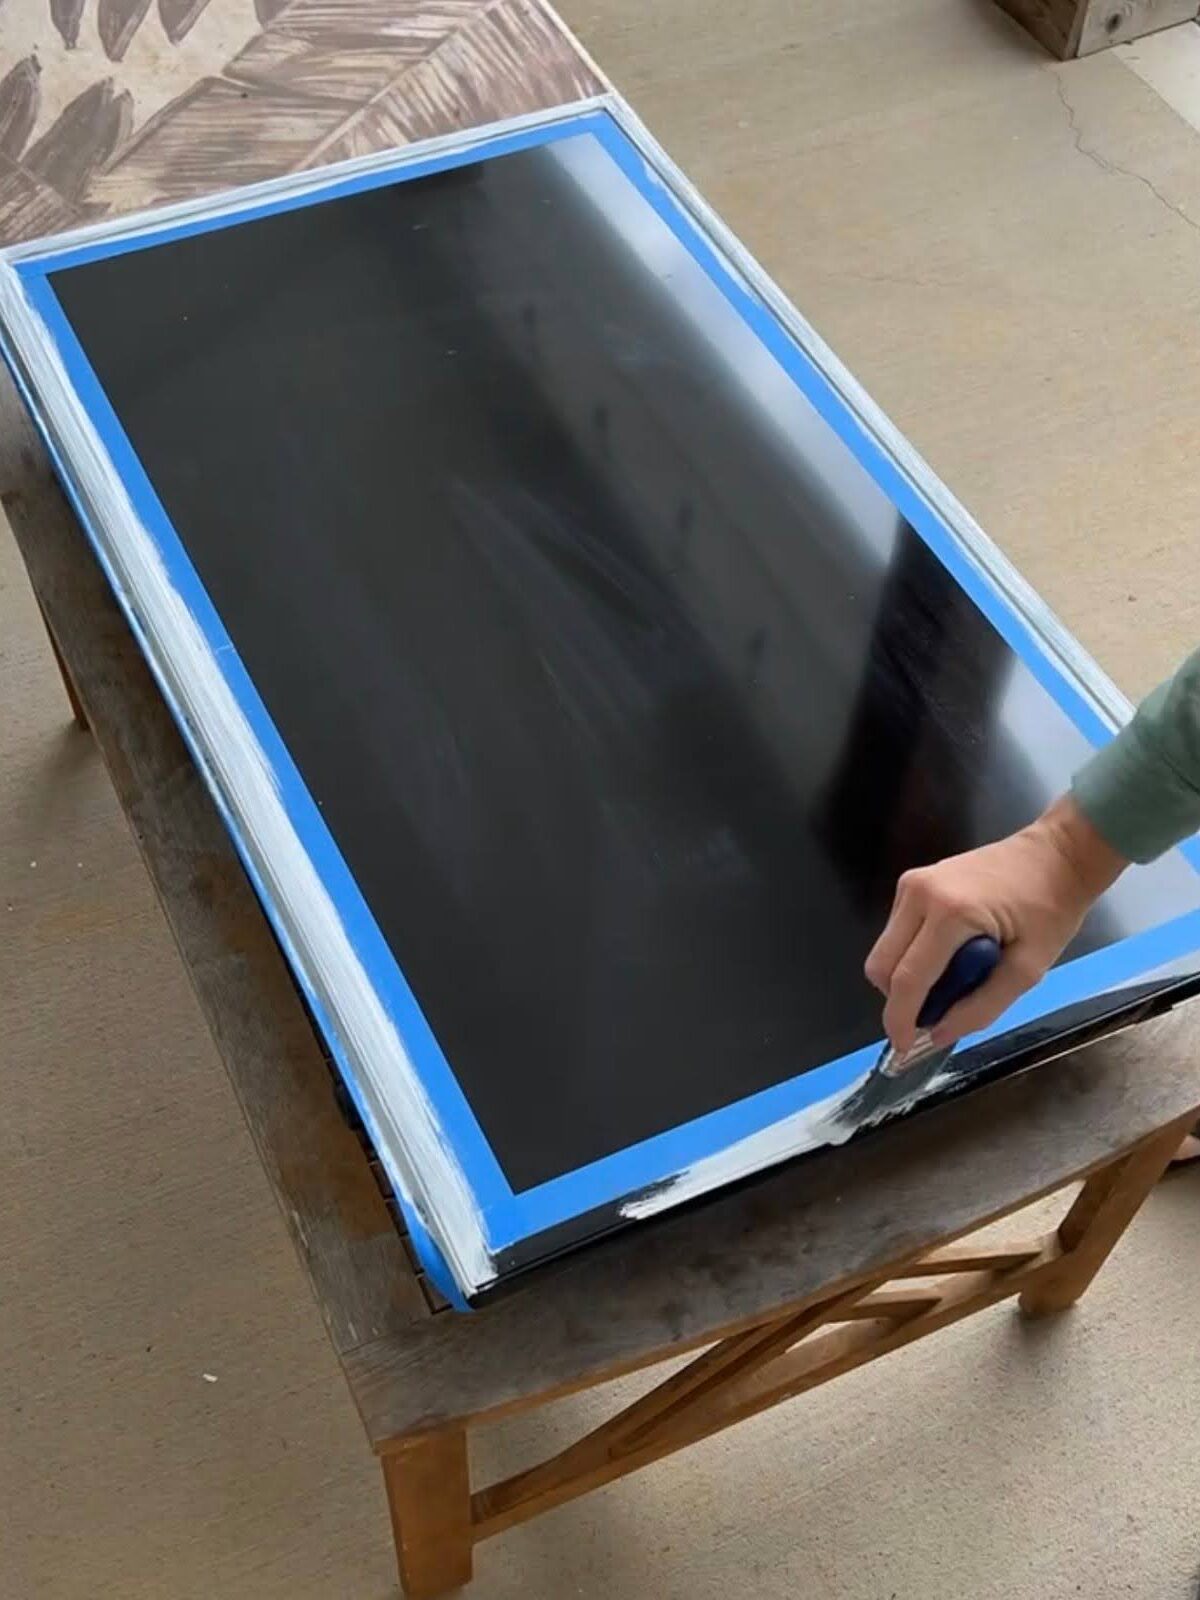
Step 1: Prep & Tape the TV
Before painting, make sure the TV is completely turned off and unplugged. You can either do this while the TV is still mounted, or remove it from your wall and paint it on the ground or table! I’ve done it both ways!
Carefully tape off the inside edge of the TV frame and along the outer edges to protect the screen and prevent paint from getting underneath the frame or onto the display. Take your time here! Clean taping makes all the difference and ensures crisp edges when you’re done.
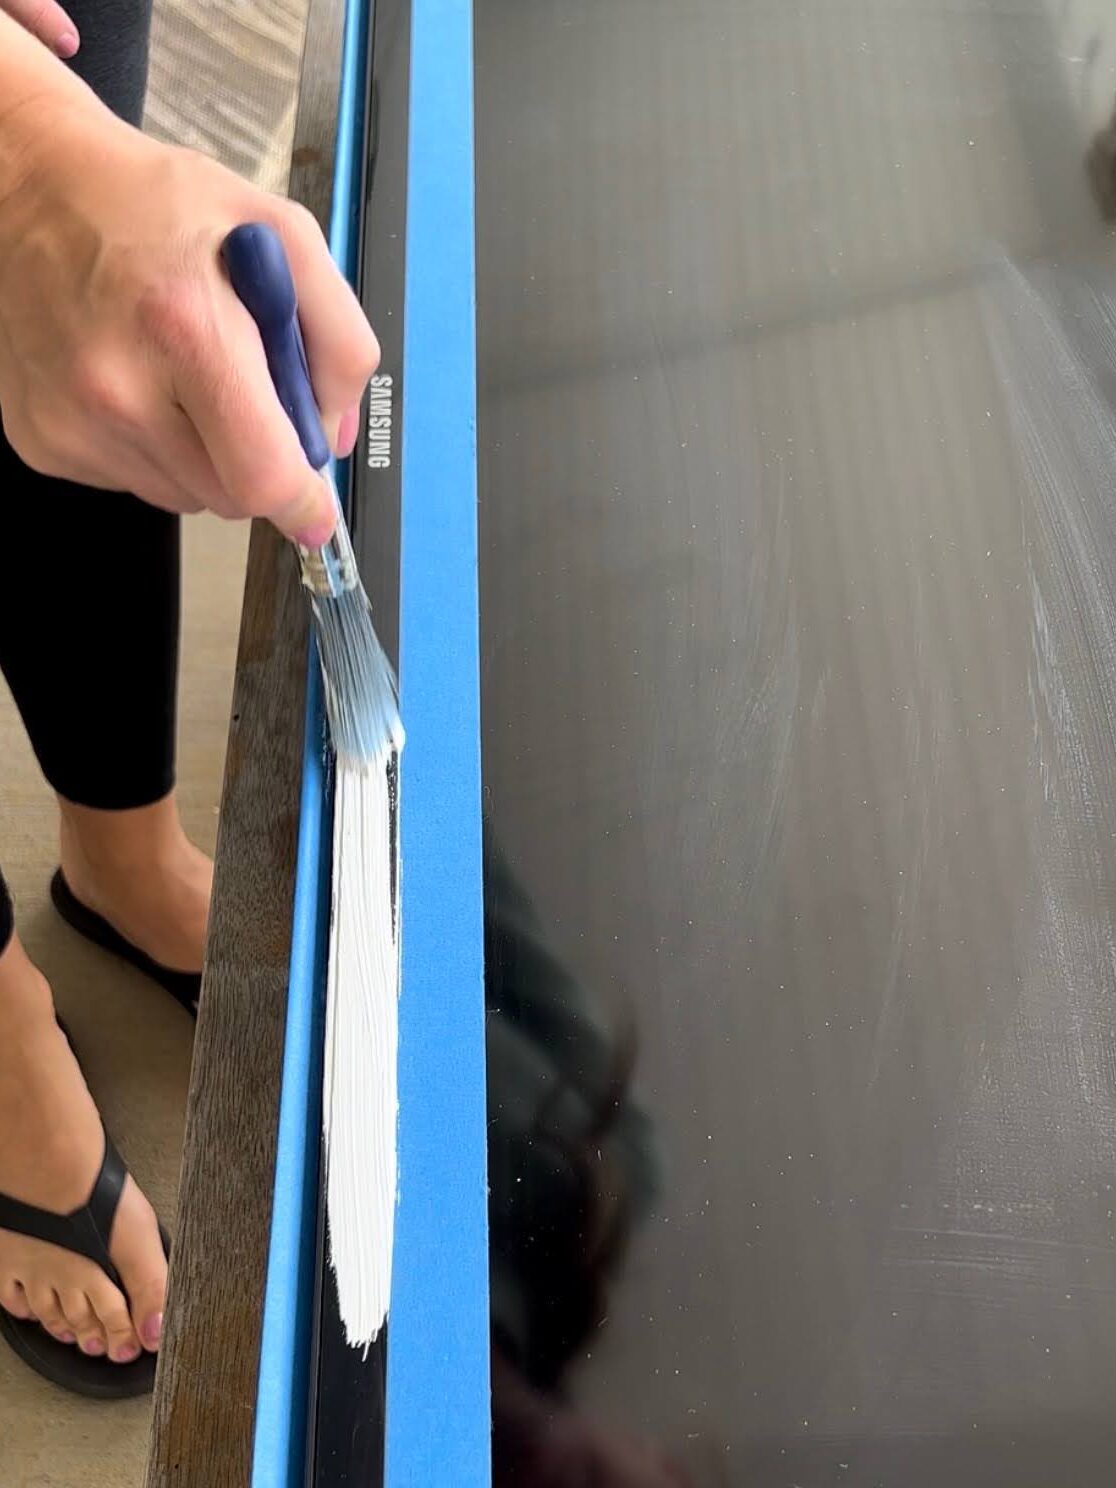
Step 2: Apply the Chalk Paint
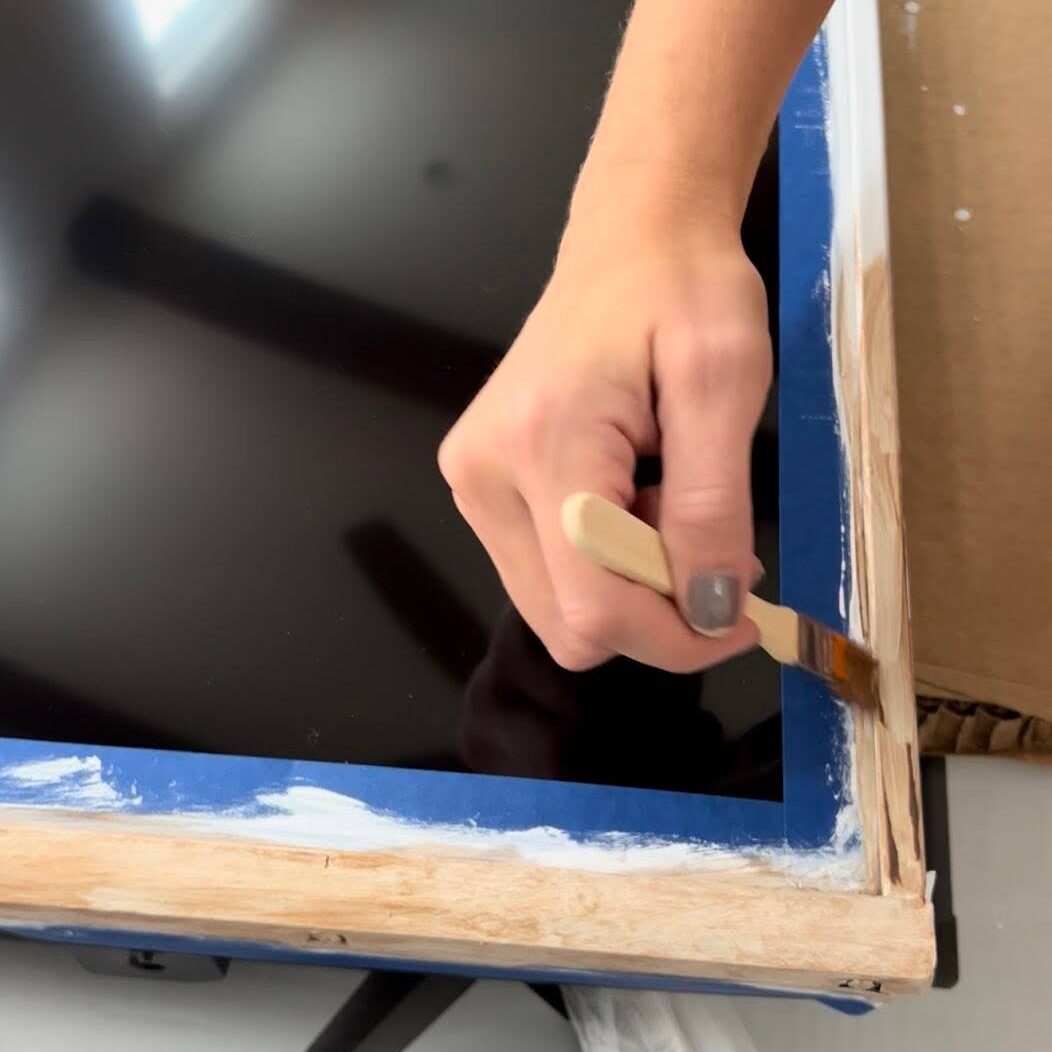
Using your paintbrush, apply the first coat of white chalk paint directly onto the TV border.
Once dry, apply a second coat to fully cover the black frame. Don’t worry about brush strokes, this actually works in your favor. The slight texture helps mimic a natural wood grain, giving the frame a more authentic, vintage feel.
Allow the paint to dry completely before moving on.
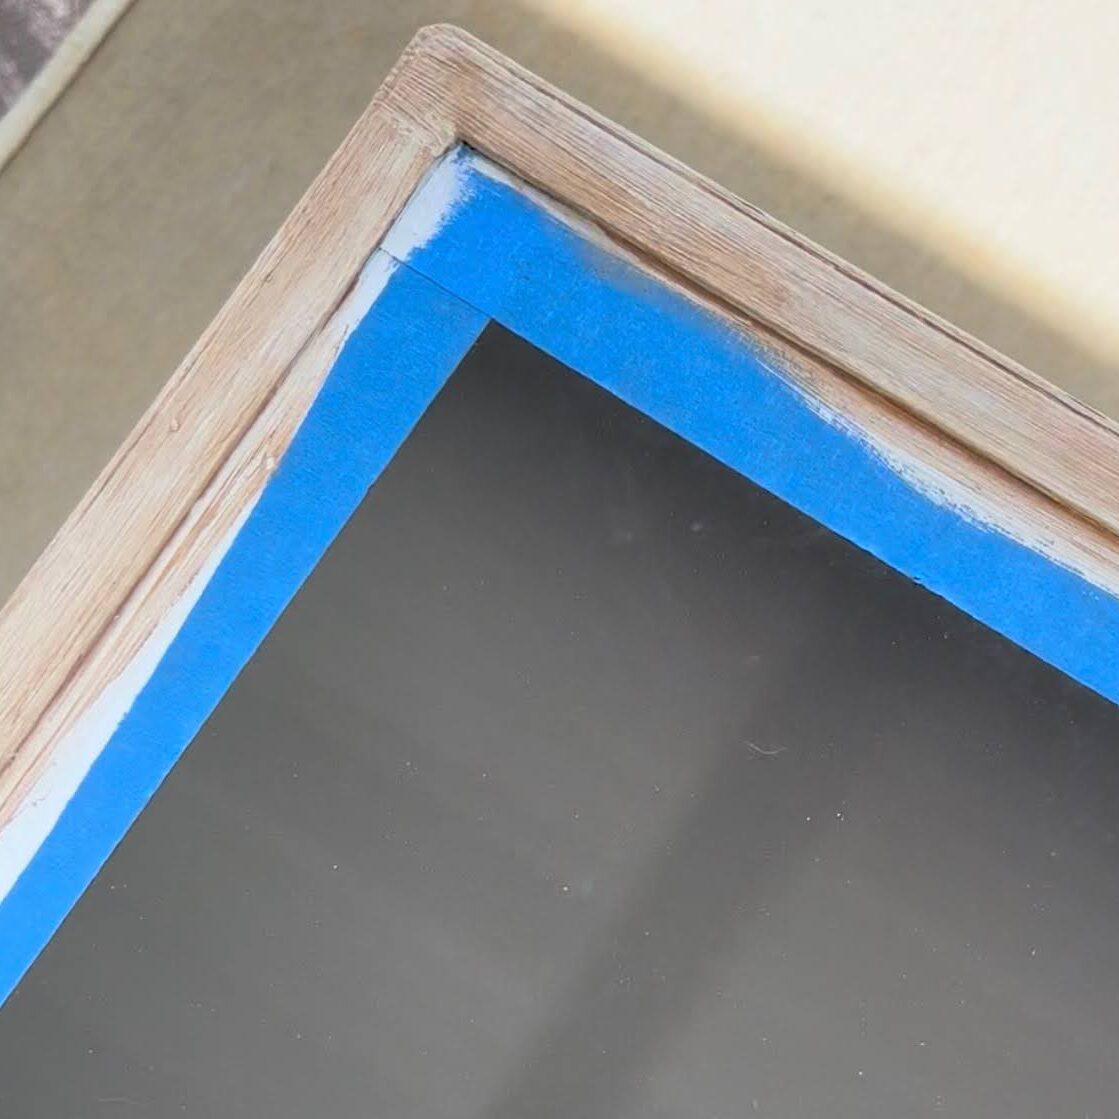
Step 3: Add the Crème Wax
After the chalk paint is fully dry, apply one coat of brown crème wax over the painted frame.
This step adds depth, warmth, and that aged wood look that really sells the “vintage frame” effect. You can apply lightly for a softer finish or build it up slightly if you want a darker, more antique look. I also keep an old rag handy to wipe it lightly if it builds up too much. There is no one right way to do this! Just play with it until you achieve your desired look and color.
Let the wax dry according to the product instructions.
Step 4: Rehang & Style
Once everything is dry, remove the painter’s tape and hang the TV back up (if you removed it in the first step).
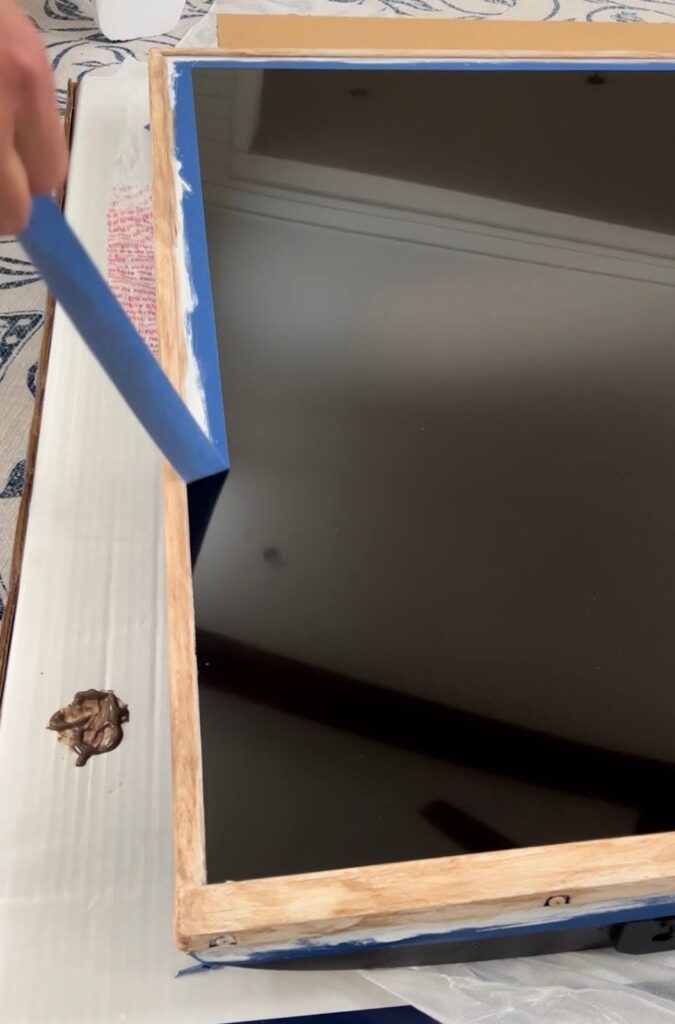
Finish it off by pulling up a vintage art video on YouTube, and step back to admire your work. The painted border instantly elevates the look and makes the TV blend seamlessly into your decor.
Final Thoughts
This DIY is proof that you don’t need a Frame TV to get the same cozy, curated look. With just two products and a little patience, you can transform your TV into a piece that feels intentional, stylish, and perfectly at home in a vintage-inspired space.
Pro tip: Always test on an older or spare TV if you’re nervous, then once you see how easy it is, you’ll feel confident taking it to your main TV.


Comments +