

This post includes affiliate links. If you make a purchase through these links, I may earn a small commission at no additional cost to you.
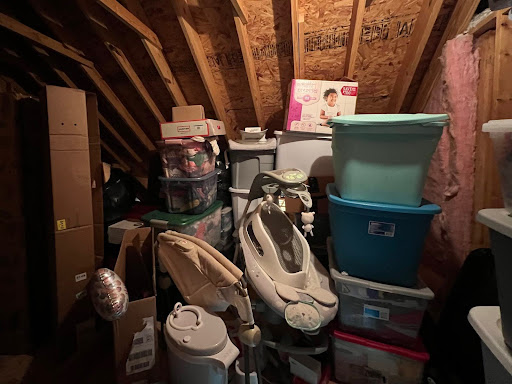
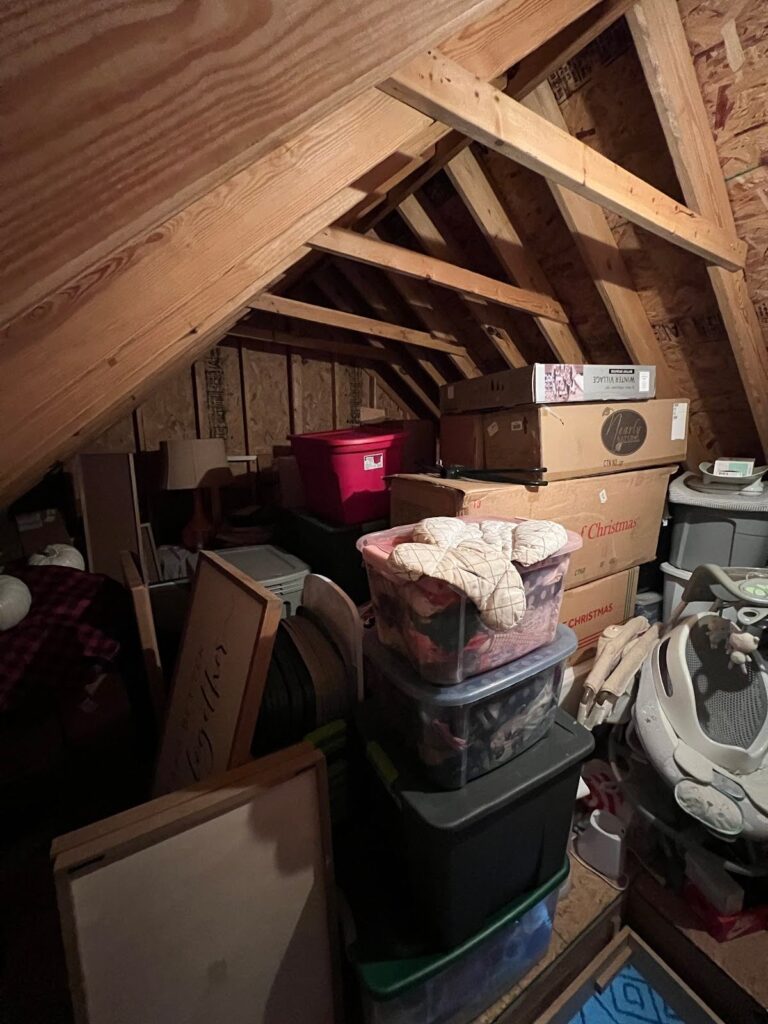
If you’ve ever walked into your attic and immediately felt overwhelmed…same. Our attic was a great size, but somehow the bigger it was, the more stuff kept piling up. Baby items, outgrown clothes, seasonal décor, it became the catch‑all for literally everything.
Since this is the only real storage space in the house, I knew it was time to make it actually functional for our family. That meant a big purge, a solid plan, and turning unused space into something organized and easy to use. What started as a cluttered attic ended up feeling like an entirely new space, with tons of added floor space and custom shelving that completely changed how we use it. Let’s get into how I did it and how you can do it too! If you’d like to see more video content of this project, you can check out my Instagram highlight and reels Part 1 and Part 2. Be sure to follow me there if you aren’t already to see the rest of my projects!
Materials Needed
Here’s what was used to complete this attic upgrade:
- Plywood sheets (for flooring and shelving)
- 2×4 lumber
- Construction screws
- Drill
- Miter saw
- Circular saw
- Tape measure
- Level
- Pencil
- Stud finder (optional but helpful)
- Protective mask (especially important when working around insulation)
- Gloves
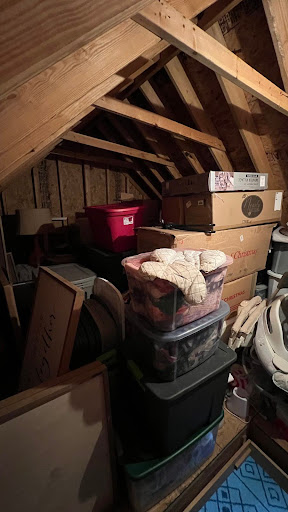
Step 1: Clear It Out & Purge First
Before you build anything, clear everything out.
We pulled out all the baby stuff, clothes, décor — everything. This was also the perfect time to purge what we no longer needed. I wanted the attic completely empty so I could see exactly what kind of space I was working with. Starting with a blank slate also makes the whole process feel way less overwhelming.
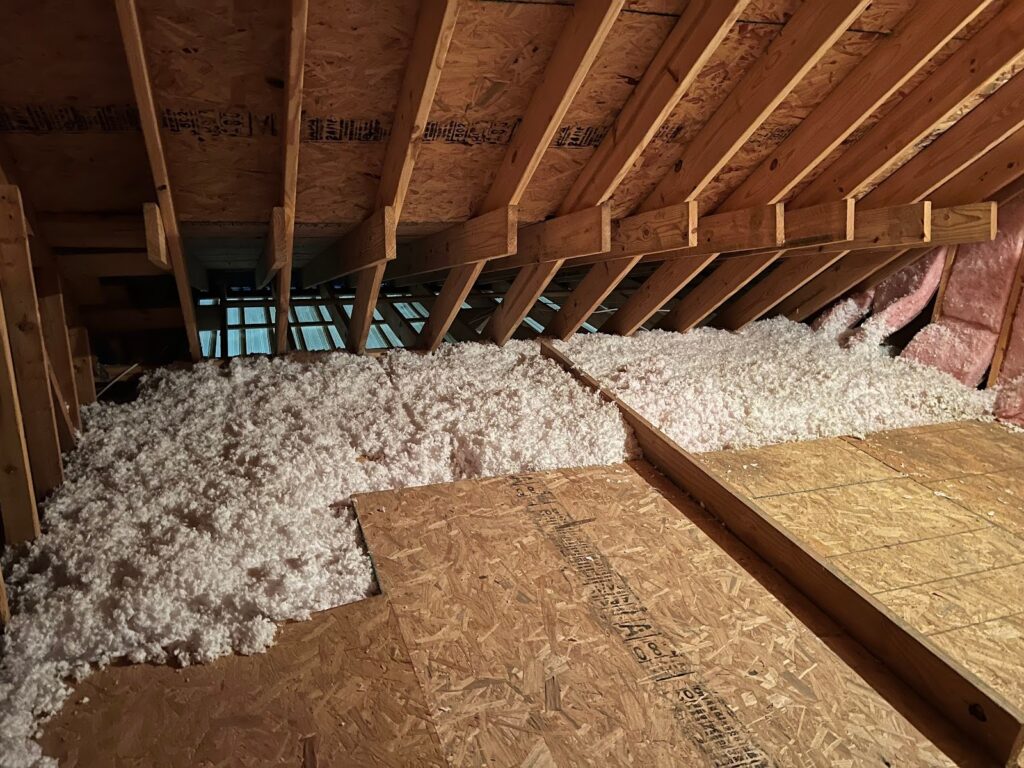
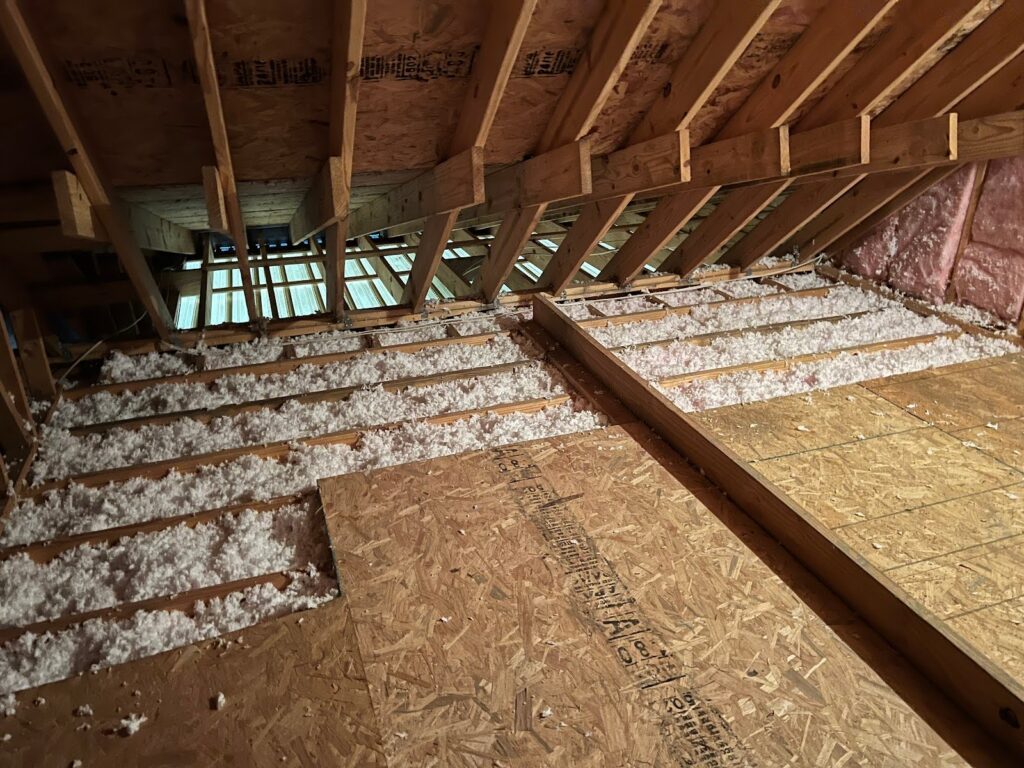
Step 2: Find the Unused Floor Space
Most attics have a surprising amount of wasted space where insulation covers areas that could actually be used for storage. Start by locating the floor joists underneath the insulation so you know where it’s safe to build. Be careful when doing this!! We don’t want you falling through the ceiling!
Pro tip: Always wear a mask when working with insulation!
Step 3: Make a Simple Plan
Once you can see where flooring can be added, sketch out a quick plan or diagram. This isn’t completely necessary but it helps me have a plan to follow and determine how much wood I need – which can save a trip to the hardware store!
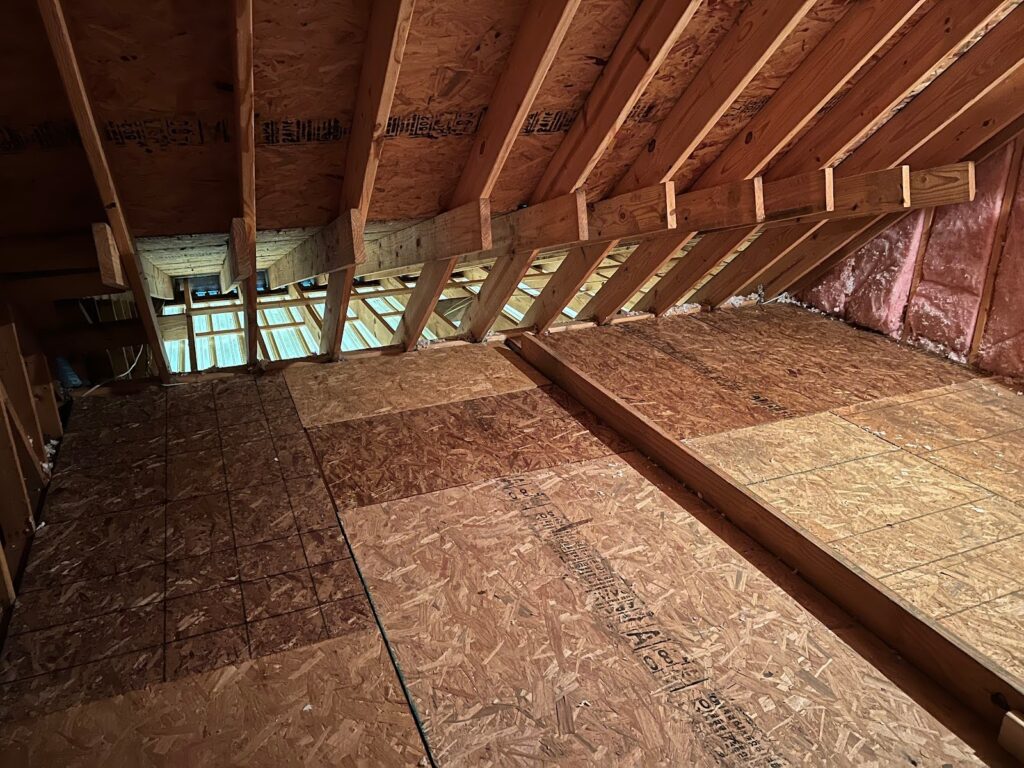
After doing some rough measurements, adding plywood to both sides of the attic (where it was previously just insulation) created about 130 square feet of extra floor space for us! That’s basically the size of one of my kids’ bedrooms. Huge win!!
Step 4: Build Out the Floor (Where It Gets Exciting)
This is the step where the attic really starts to feel like usable space.
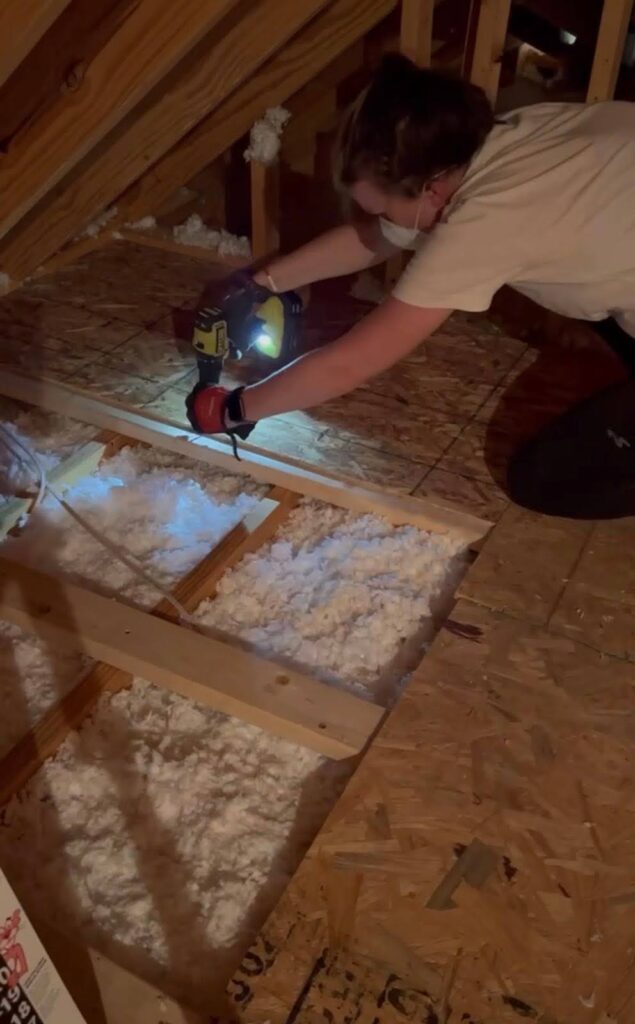
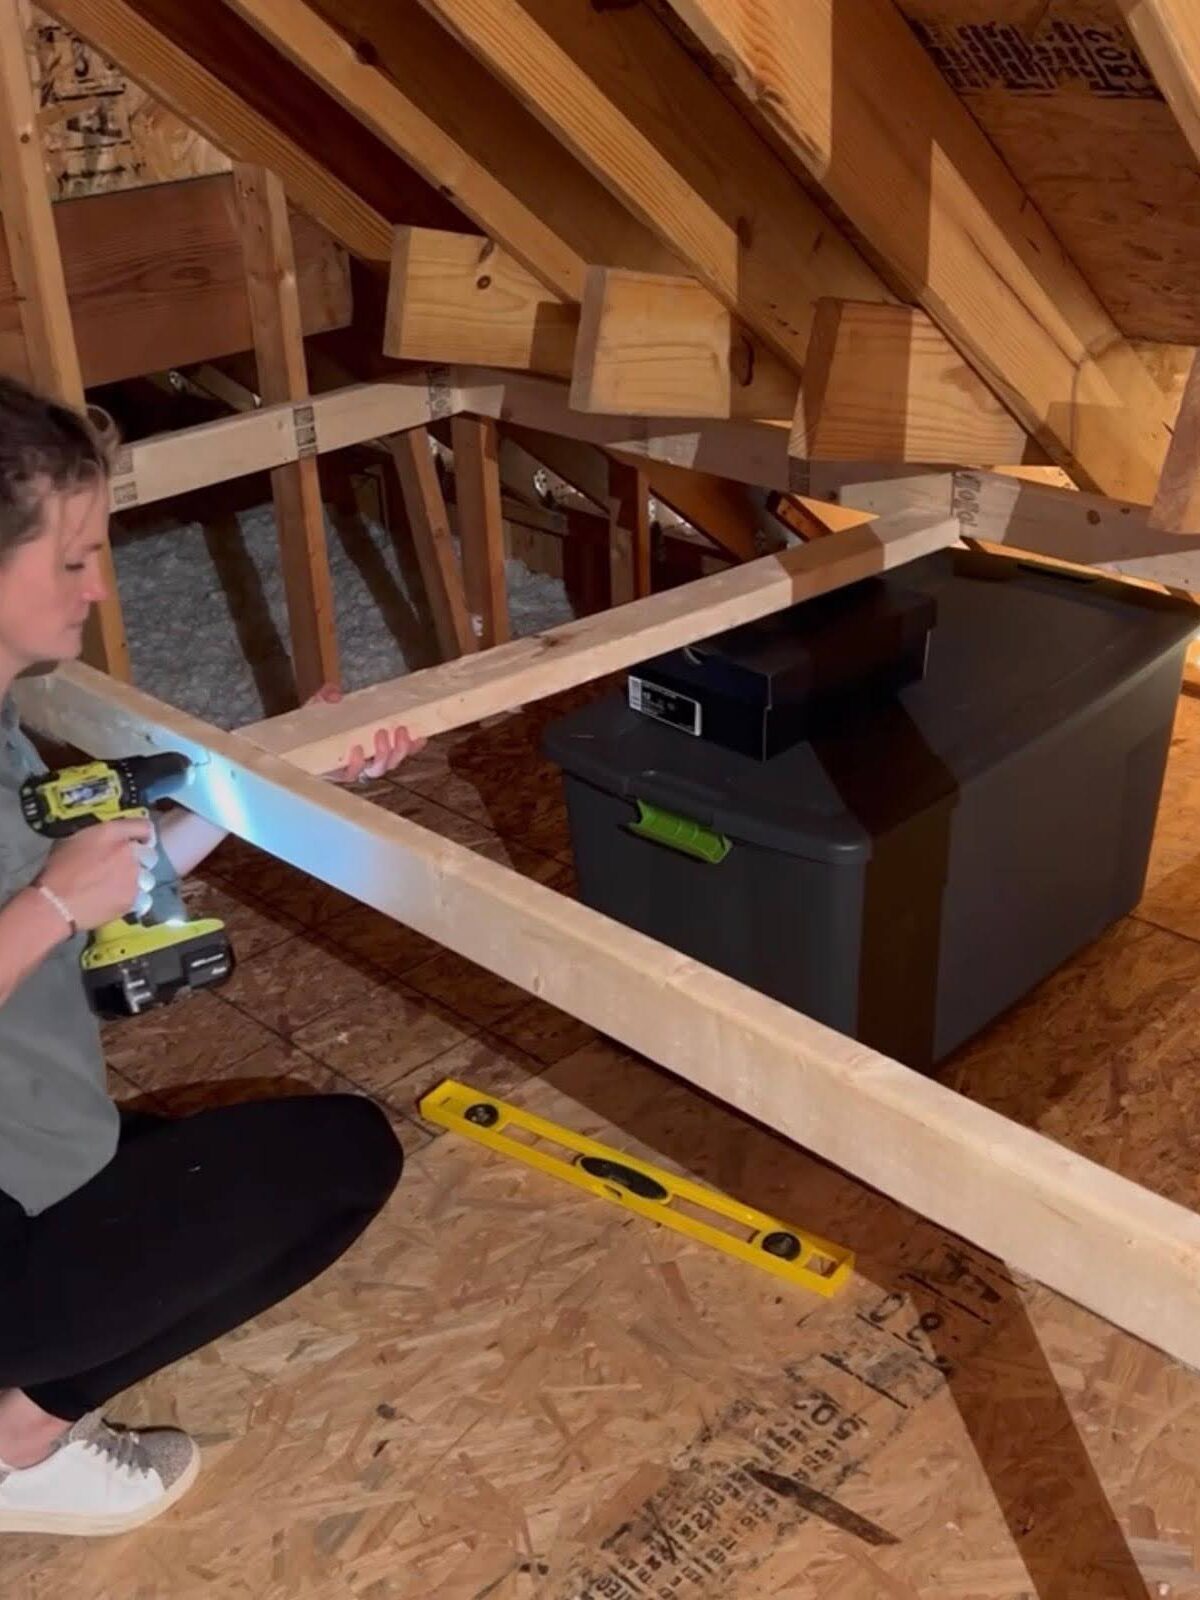
To start, lay 2x4s perpendicular to the existing floor joists. This helps distribute weight evenly and creates a strong base for the flooring. Take your time lining everything up!
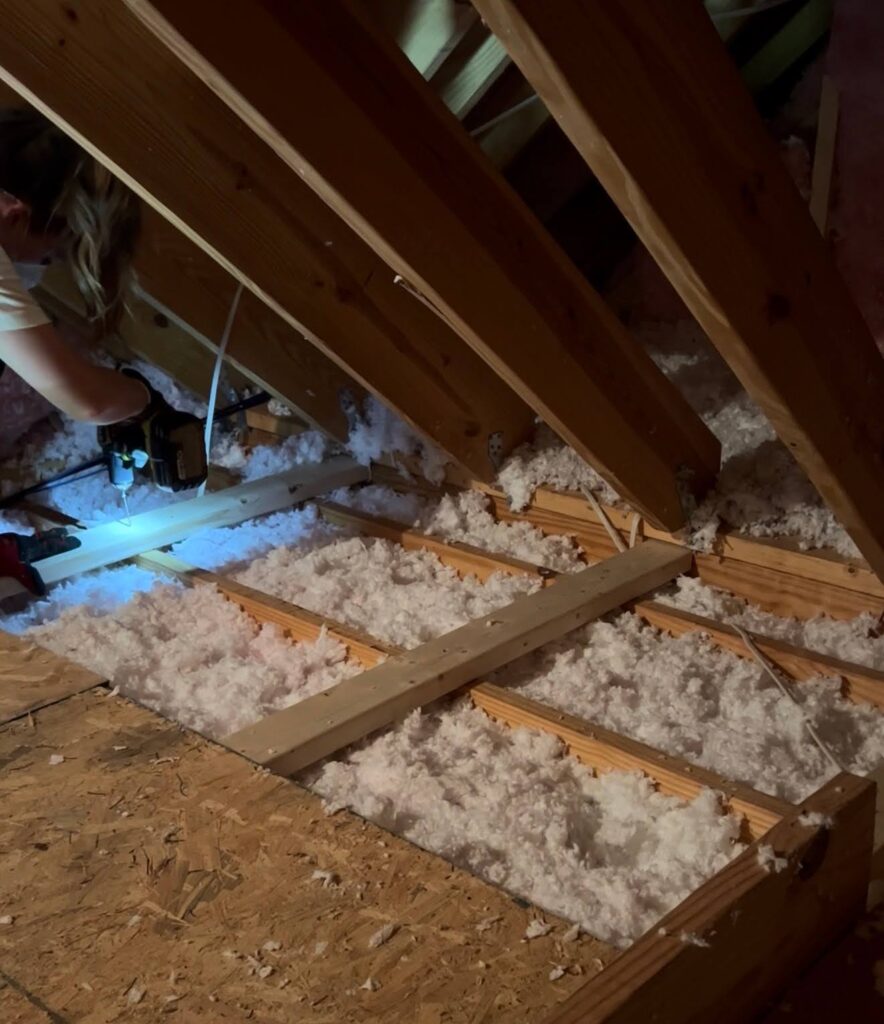
Next, place plywood sheets on top of the 2x4s. Measure and cut using a circular saw as needed, then secure everything with construction screws.
Once this step is done, those once‑unused areas instantly become solid, walkable floor space.

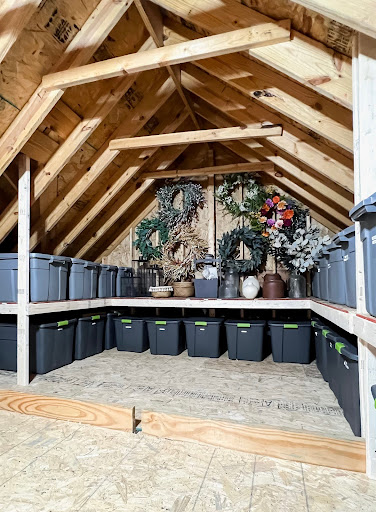
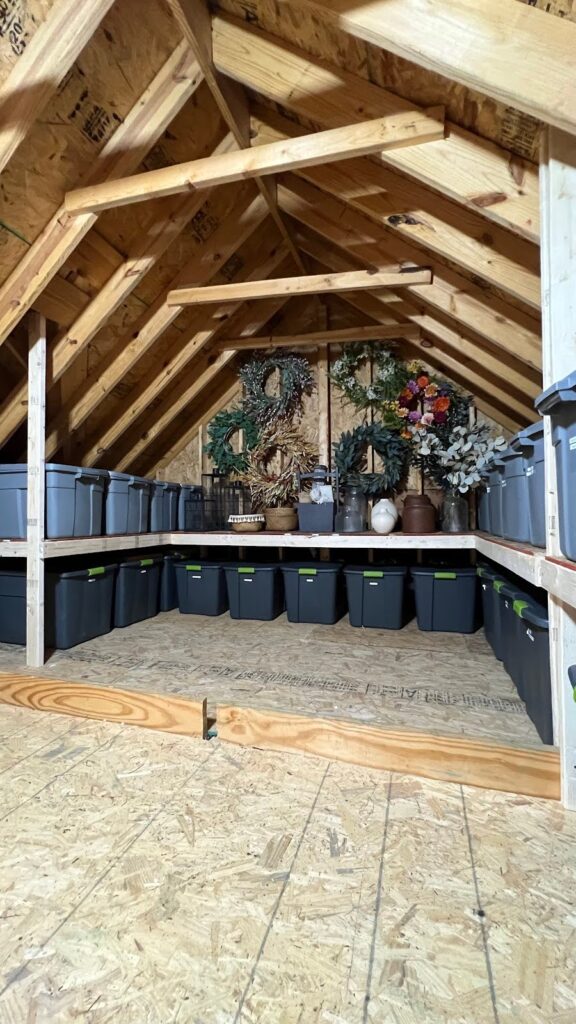
Step 5: Build the Shelving Frames
Now for the part that really pulls everything together: the shelving.
Start by building a sturdy frame using 2x4s. This gives you a strong base that can hold heavier storage bins without any stress. Your frame will depend on how your attic is constructed, so you may need to get creative here. You can see in the second picture I needed to add a vertical board to serve as a stud for holding up one corner of my shelf frame. Once the frame is built, add plywood on top and secure it with construction screws.
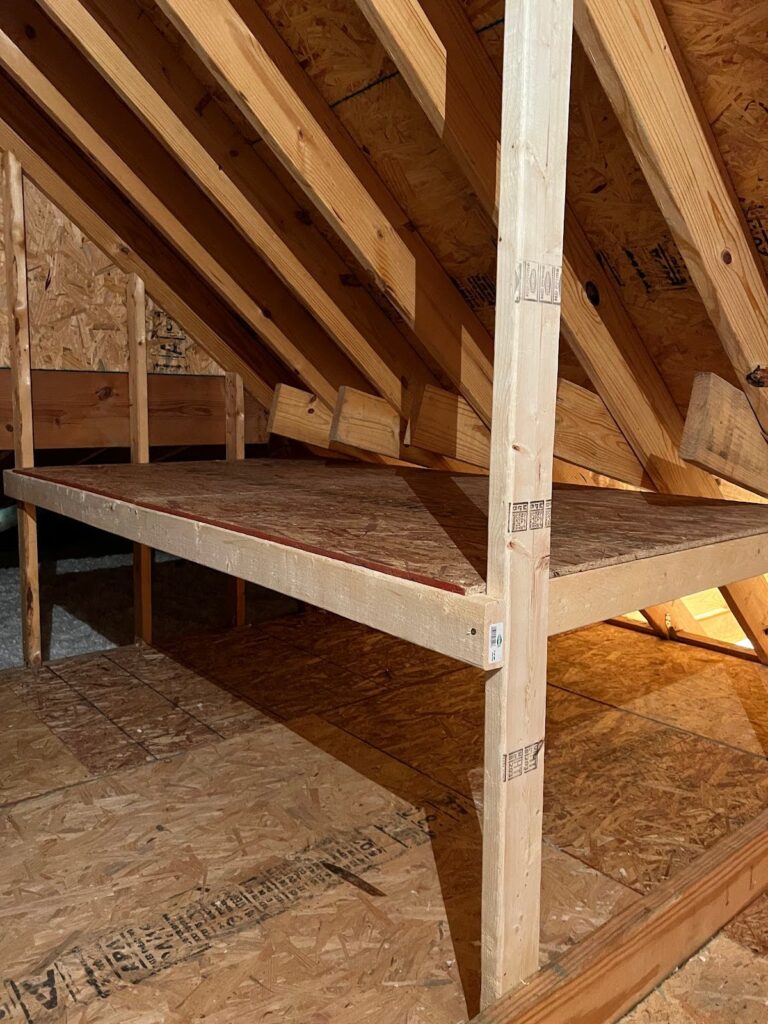
The magic of this setup? You can store bins on top of the shelves and underneath them, which doubles your storage without taking up extra floor space. It keeps everything easy to grab and way more organized than stacking bins everywhere.
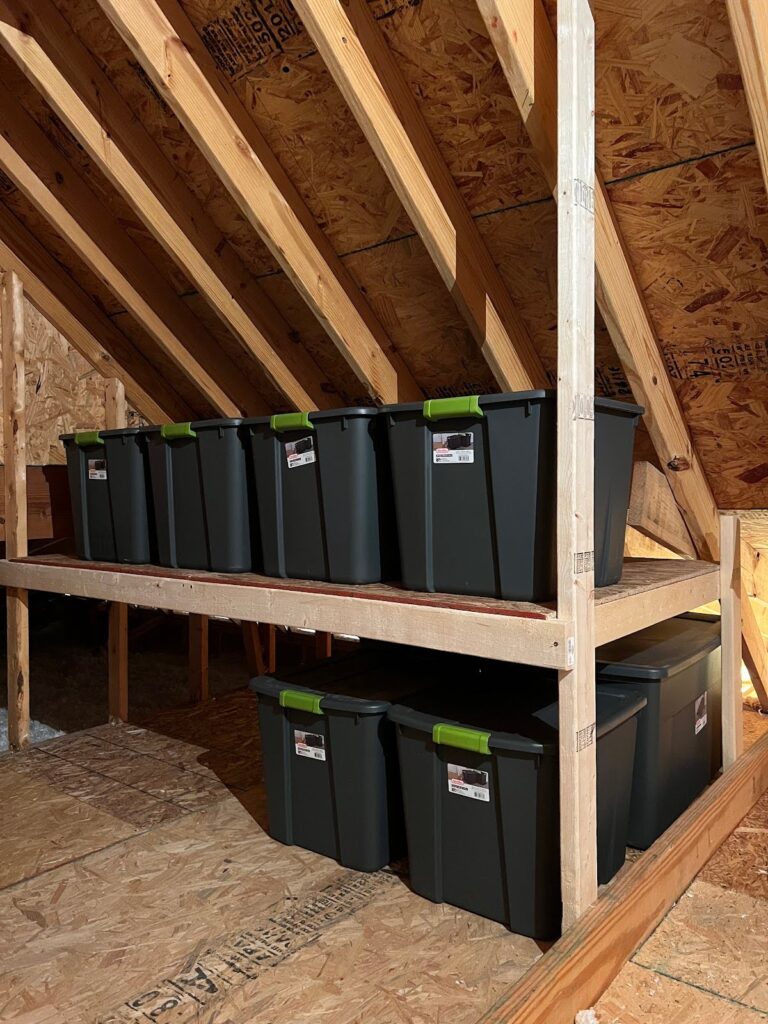
If you have the space, don’t stop at just one shelving unit! Continue shelving along any walls you see fit. For us, I was able to continue shelving along our both slanted walls + more on the flat wall for even more storage. I use this area to store some of my non-seasonal home decor and added hooks on the walls for my wreaths!
Pro tip: Work with the shape of your attic instead of against it to make the space feel intentional, custom, and surprisingly spacious!
Final Thoughts
The difference is honestly night and day.
There’s so much more floor space, everything has a place, and the attic finally feels organized and functional instead of chaotic. Best of all, it’s set up in a way that can grow with our family, without turning back into a cluttered mess.
If your attic feels overwhelming or underused, this is your sign that a little planning (and some DIY work) can completely change how it functions!


Comments +